The front upper wishbones should be a bit easier than the lower ones, smaller thinner tubes and no plates. However, there were two measurements I needed to sort out first.
Number one, the angle of the insert. I now have two inserts that have been welded inside a 25mm tube. The tube itself is 50mm long, so comparing that to the plans means I'm 5mm narrower and 10mm shorter. So all the measurements on the wishbones go out the window! To get the insert angle still at 8 degrees, I had to work out how many spacers I needed. A quick bit of trigonometry left me with 7mm of spacers required at the end, to give me an 8 degree angle.
Number two, caster angle. I'm not going rosejoints at the moment, mainly because I'm not building 'that' sort of car. I will keep an eye on rosejoints as an upgrade, but not for now. Which means I have to get the caster angle right first time, and the asymmetrical wishbones are the perfect opportunity. I am aware that 'the book' has messed up the calculations, and only gives 3.5 degrees rather than 7 (although I think this is the '£250' book rather than the 'on a budget' book). But I'm not going by 'the book', I'm mixing up various sources. So I had to work out what was ideal.
From various forums, I have 10 degrees as being a good start, so as close to that as possible. Given the measurements in the book and on my own wishbones, I worked out that with the upper wishbones as they are in the book, I would get 7 degrees camber. With the Saturn measurements, I would get 6. Yes I know it's not quite 10, but the higher the better so I'm going with the book measurements. This means an offset of 120mm for the centre of the insert.
And that's where I ended the day. The jig was sanded down ready for a new set of markings, the thin tube is ready to be cut, and my forearms are ready for a shedload of hacksawing.
Thursday 10 April 2014
Tuesday 8 April 2014
Front lower wishbone build
Some photos!! First, the plates between the wishbone tubes. This was cut from 5mm plate with a standard jigsaw and some Bosch blades. Plenty of cutting fluid, and several hours later, I had this;
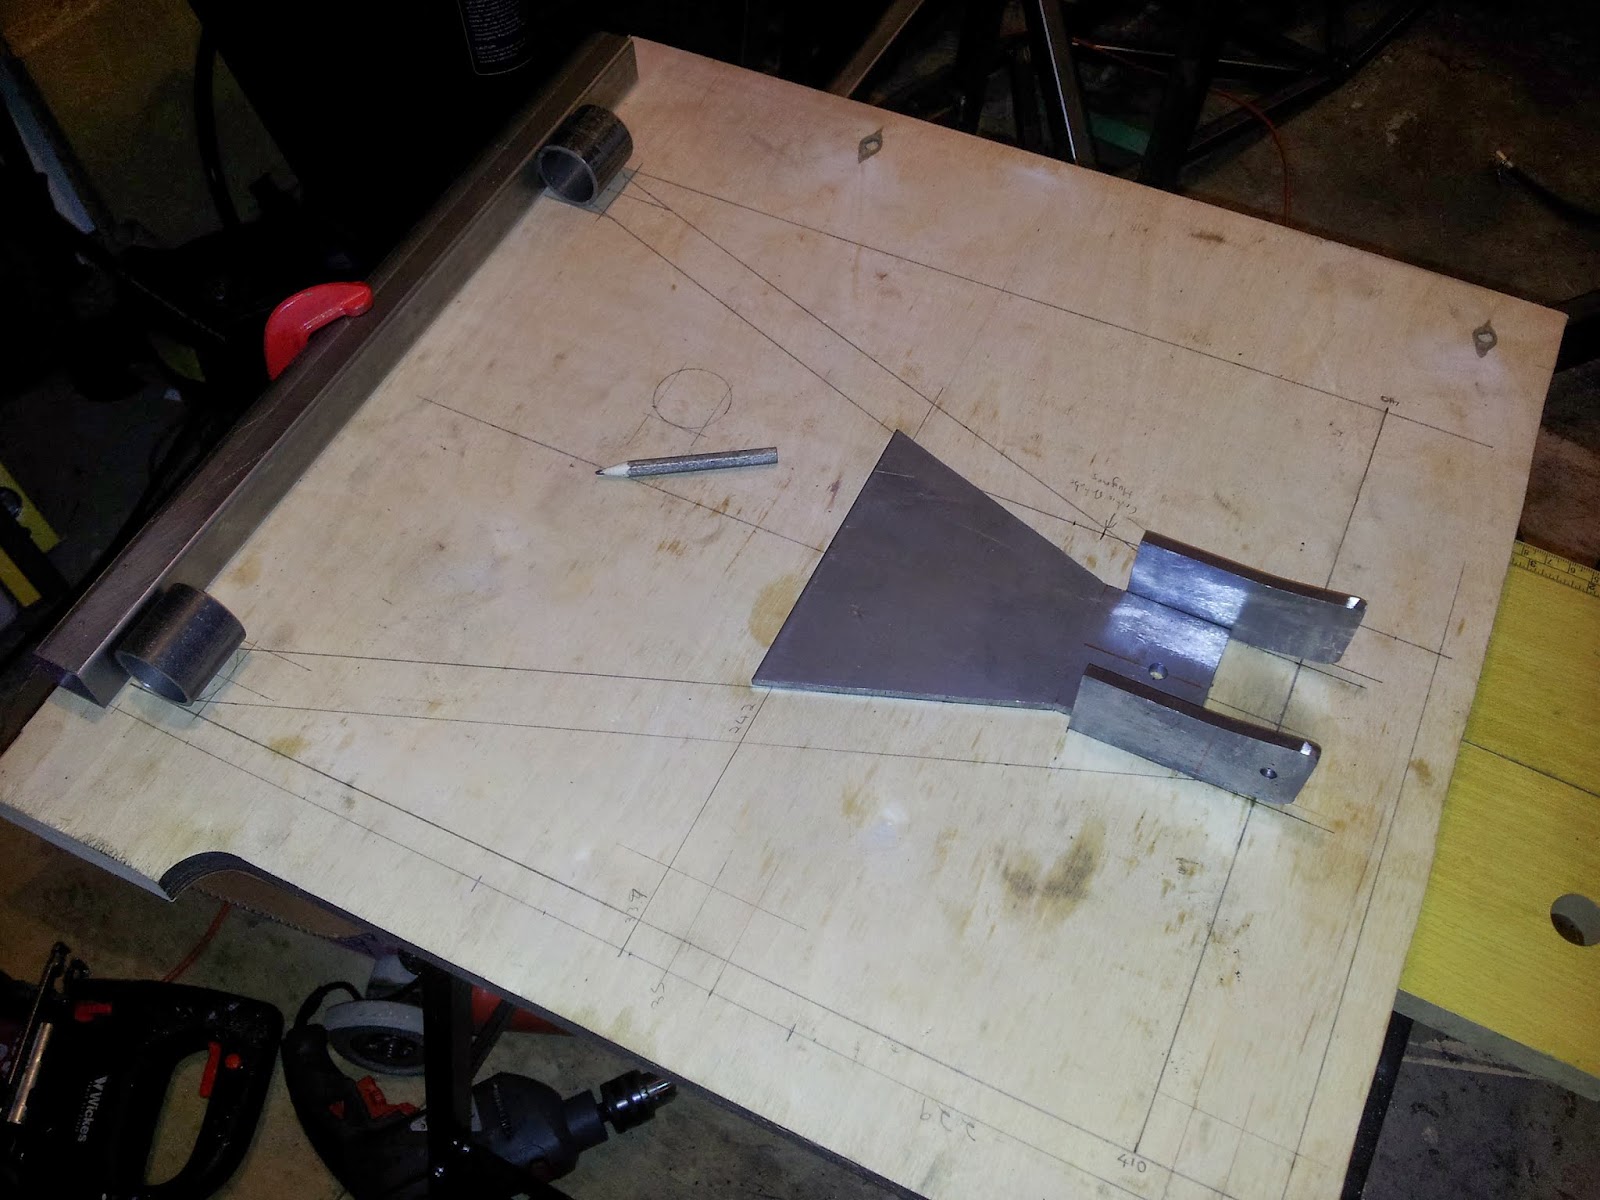
Next were the tubes themselves, just cut to length and then manually profiled to the bush tubes;

As the lower wishbones aren't handed, I did them all using this jig. That way I knew they would all be identically right (or identically wrong!). The plates I had cut for other parts of the suspension came in very useful as spacers, I kind of ignored the spacers suggested as it didn't leave all the seams in the centre. And when I was welding I wanted to make sure I was welding on welds.
Then came the bottom cut. First I tried marking it with a laser beam;
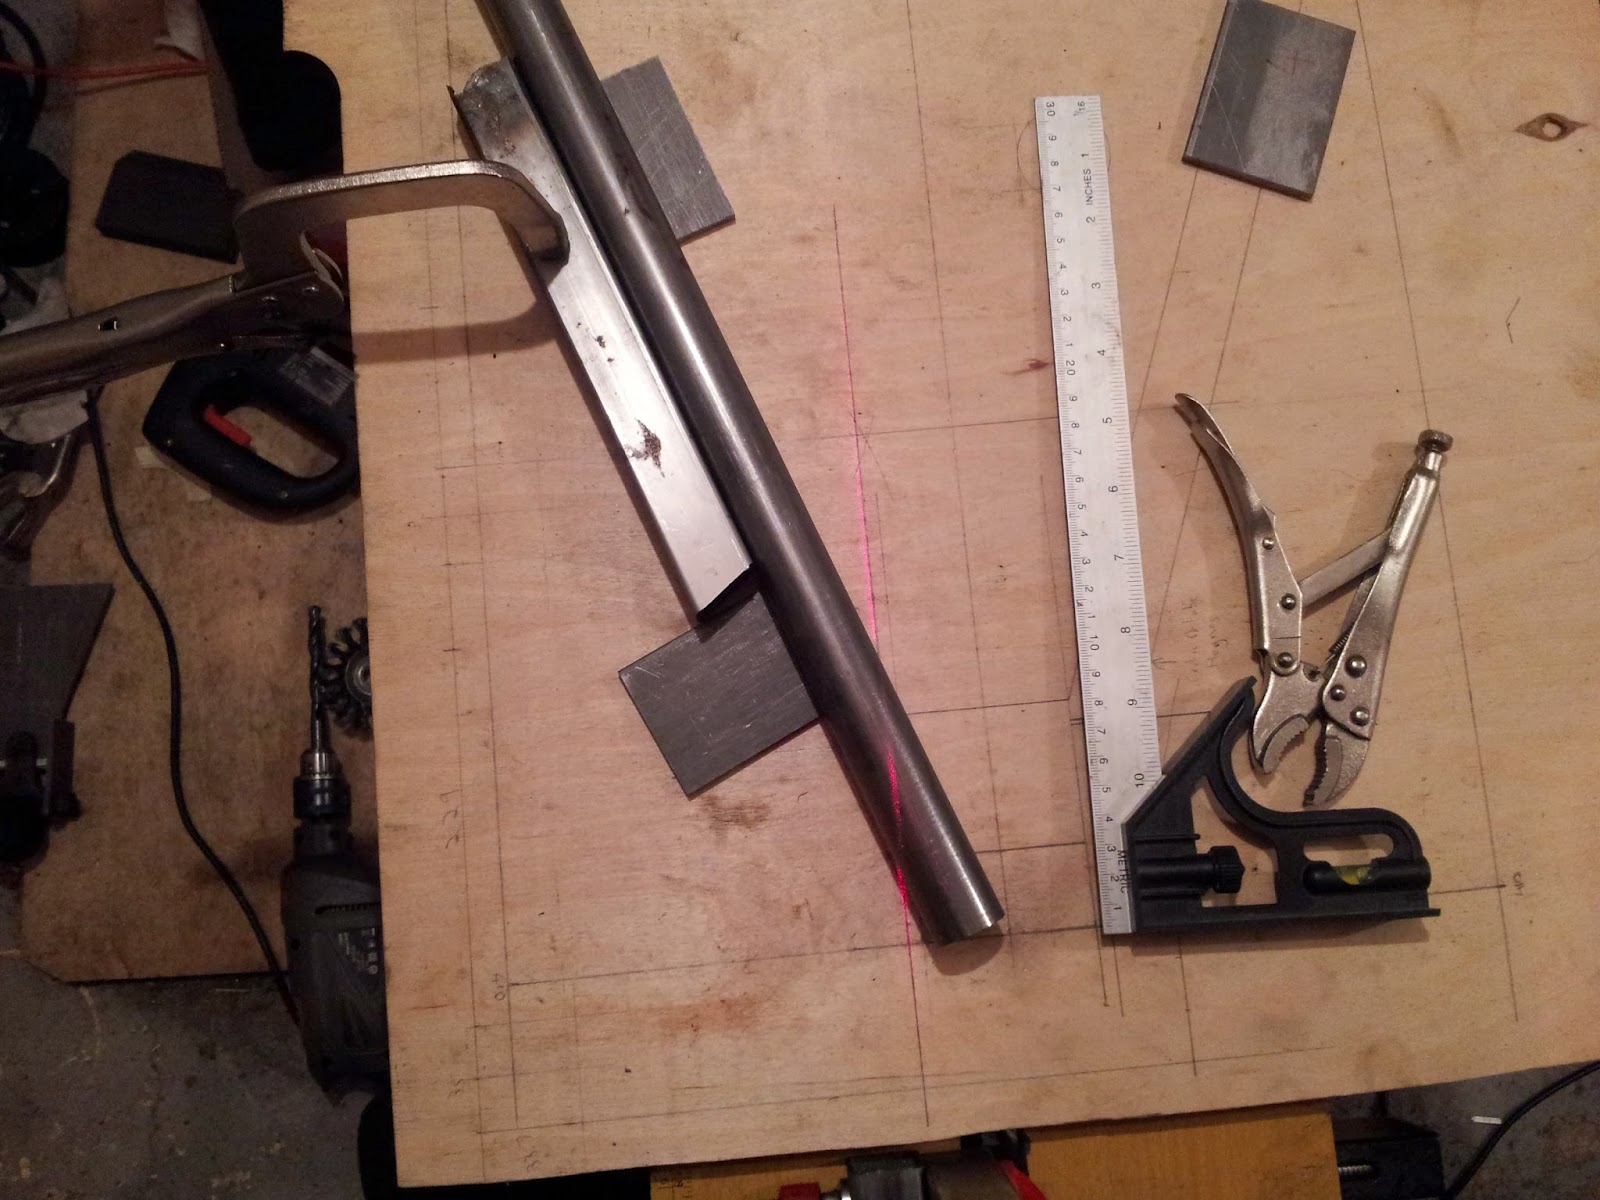
But I couldn't get it to line up perfectly, so I went for an old fashioned handsaw jig. Again, lots of hours and lots of cutting fluid later, I had all pipes cut, and a full set of parts;
A first fit showed a bit of trimming needed;

So ten minutes with a flap wheel on a grinder got them fitting perfectly. Straps and clamps aplenty ready for welding;
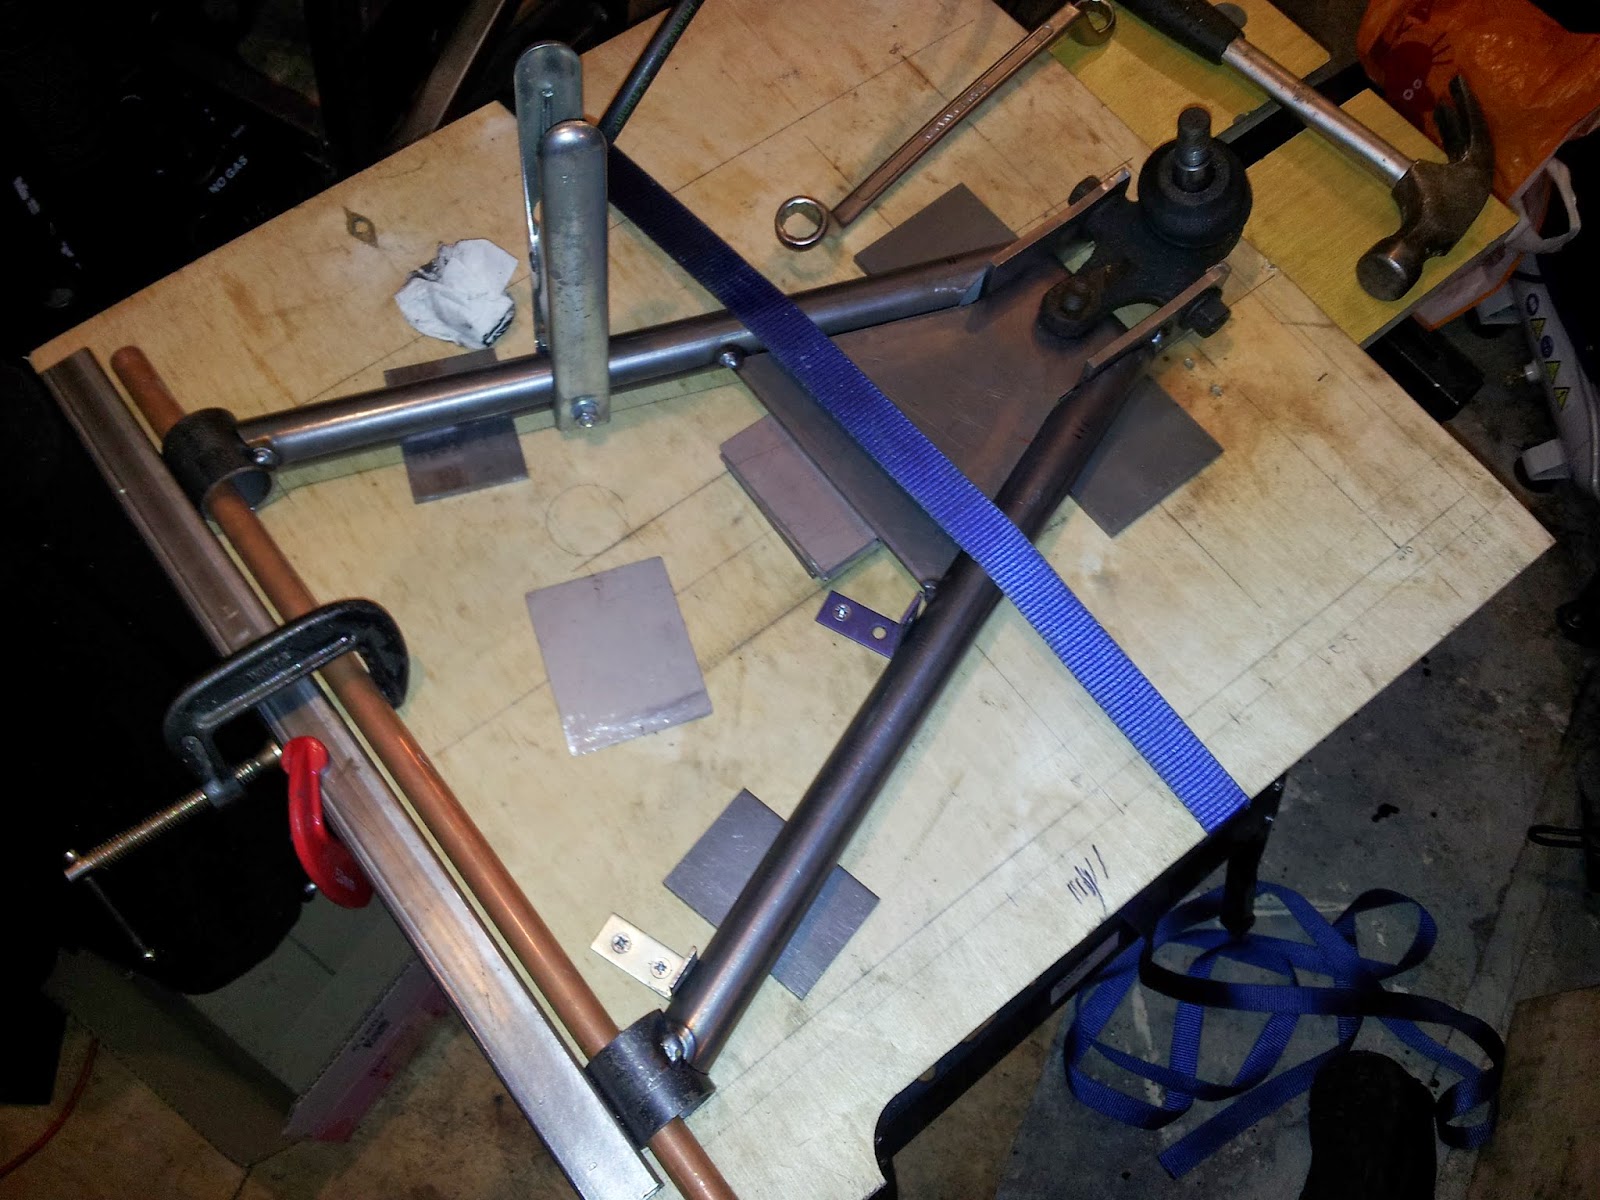
And a short time later I had two wishbones!
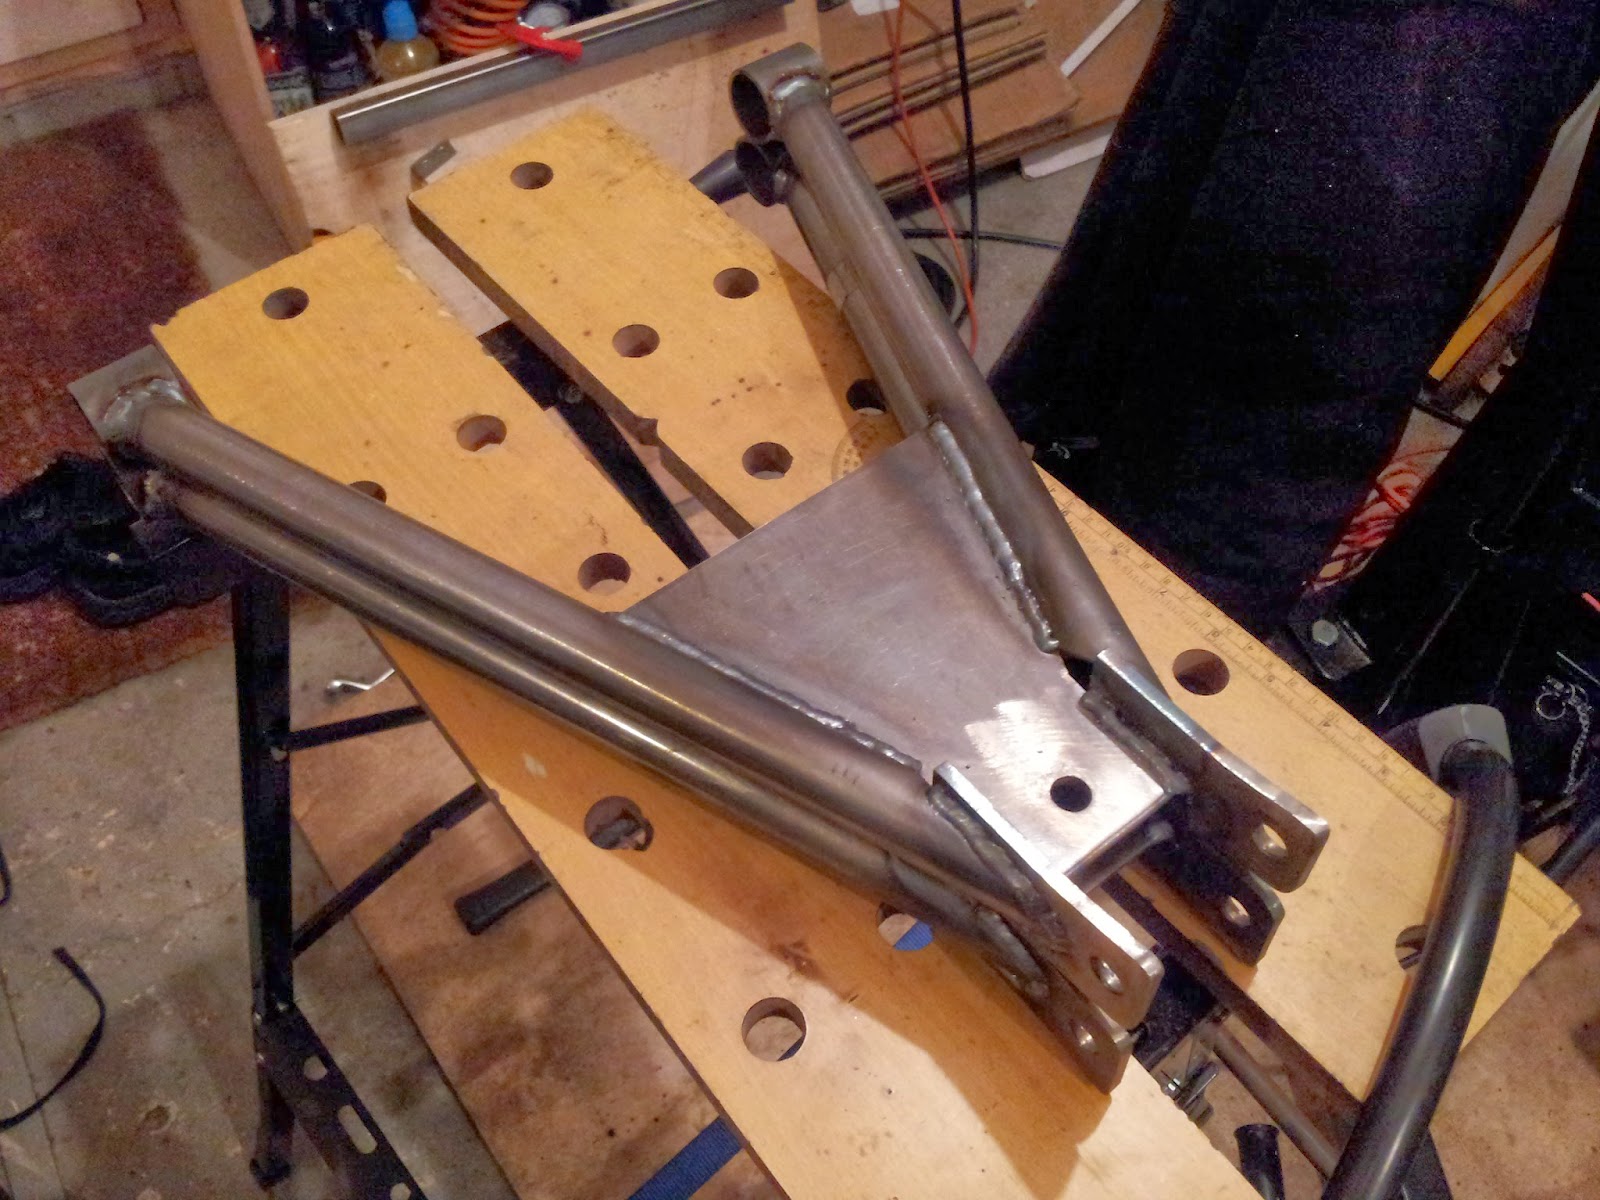
I just have a couple of holes in the end of the tube to finish off, but I might pour some waxoyl in there first. It'll probably all get burnt away as I finish the weld, but at least things will stay rust proof.
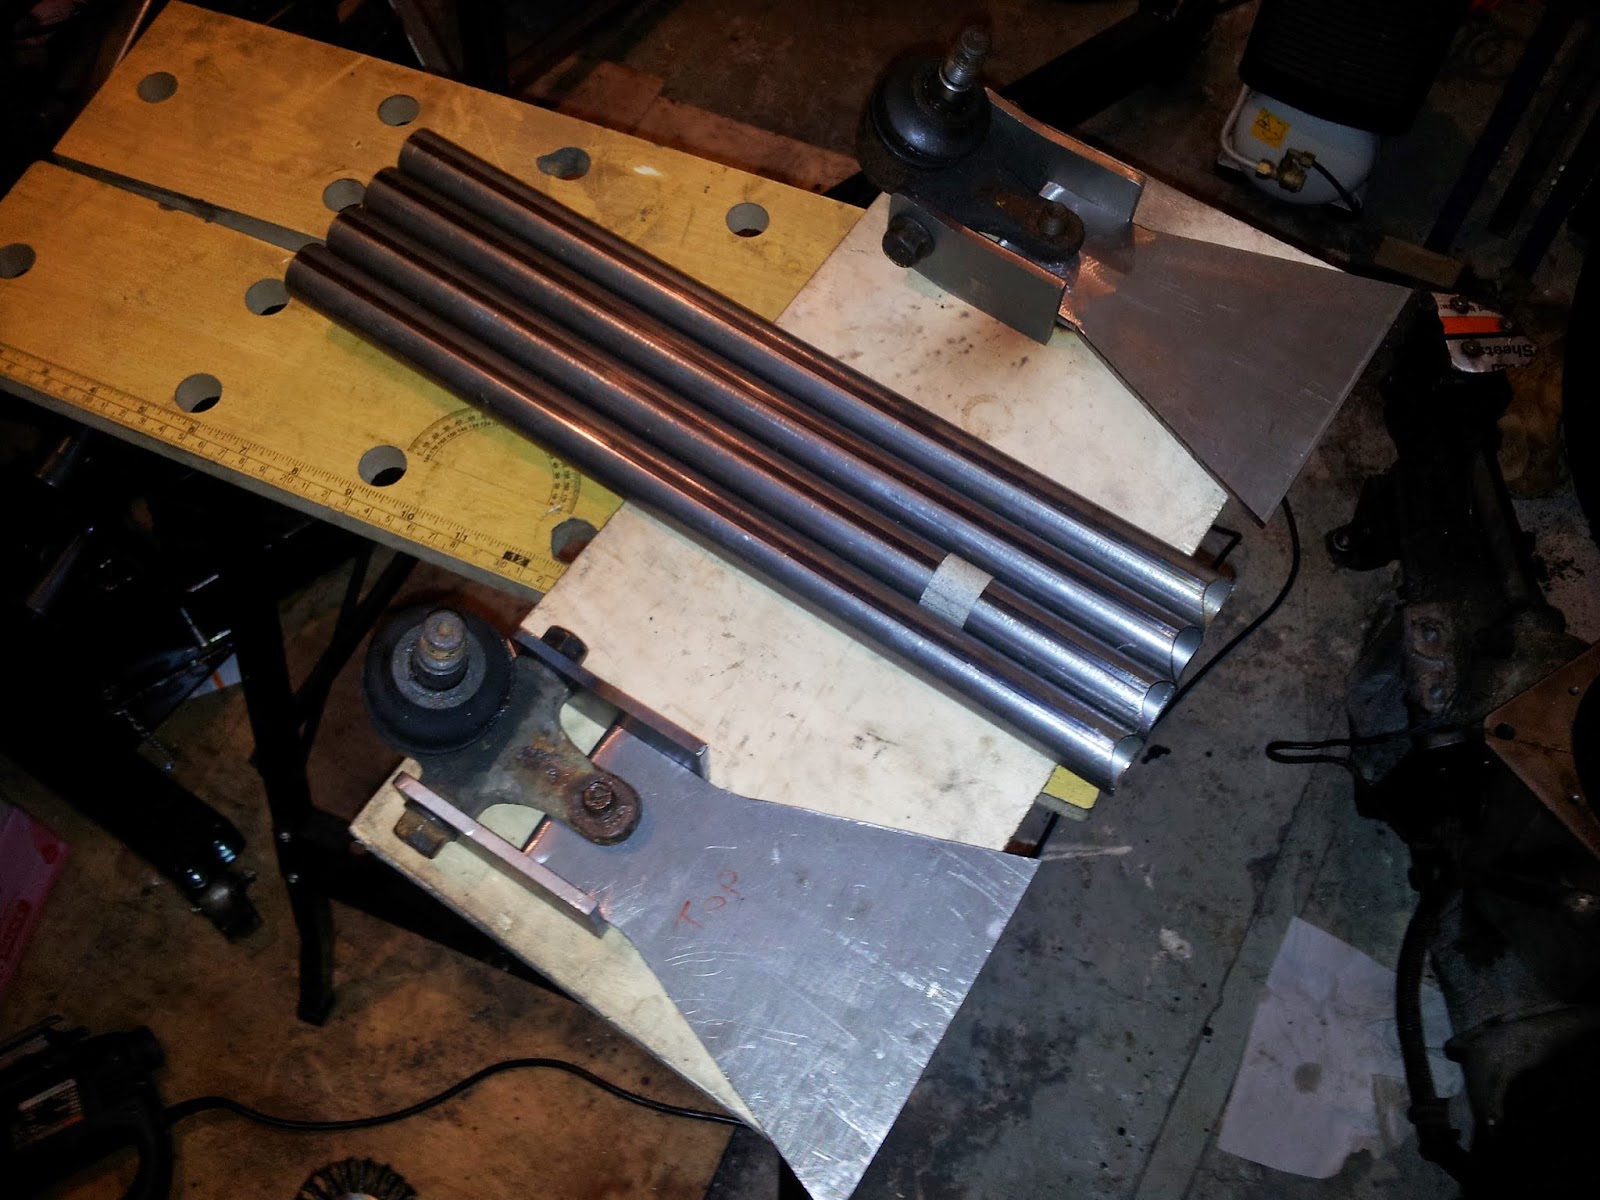
The cut tubes left an interesting profile, which got me thinking about the next stage. I need to sleeve the threaded inserts for the top wishbones, and I was advised to cut the sleeve at an angle to maximise the weld length. As it so happens, the sleeve tube is the same tube I used here!! So;
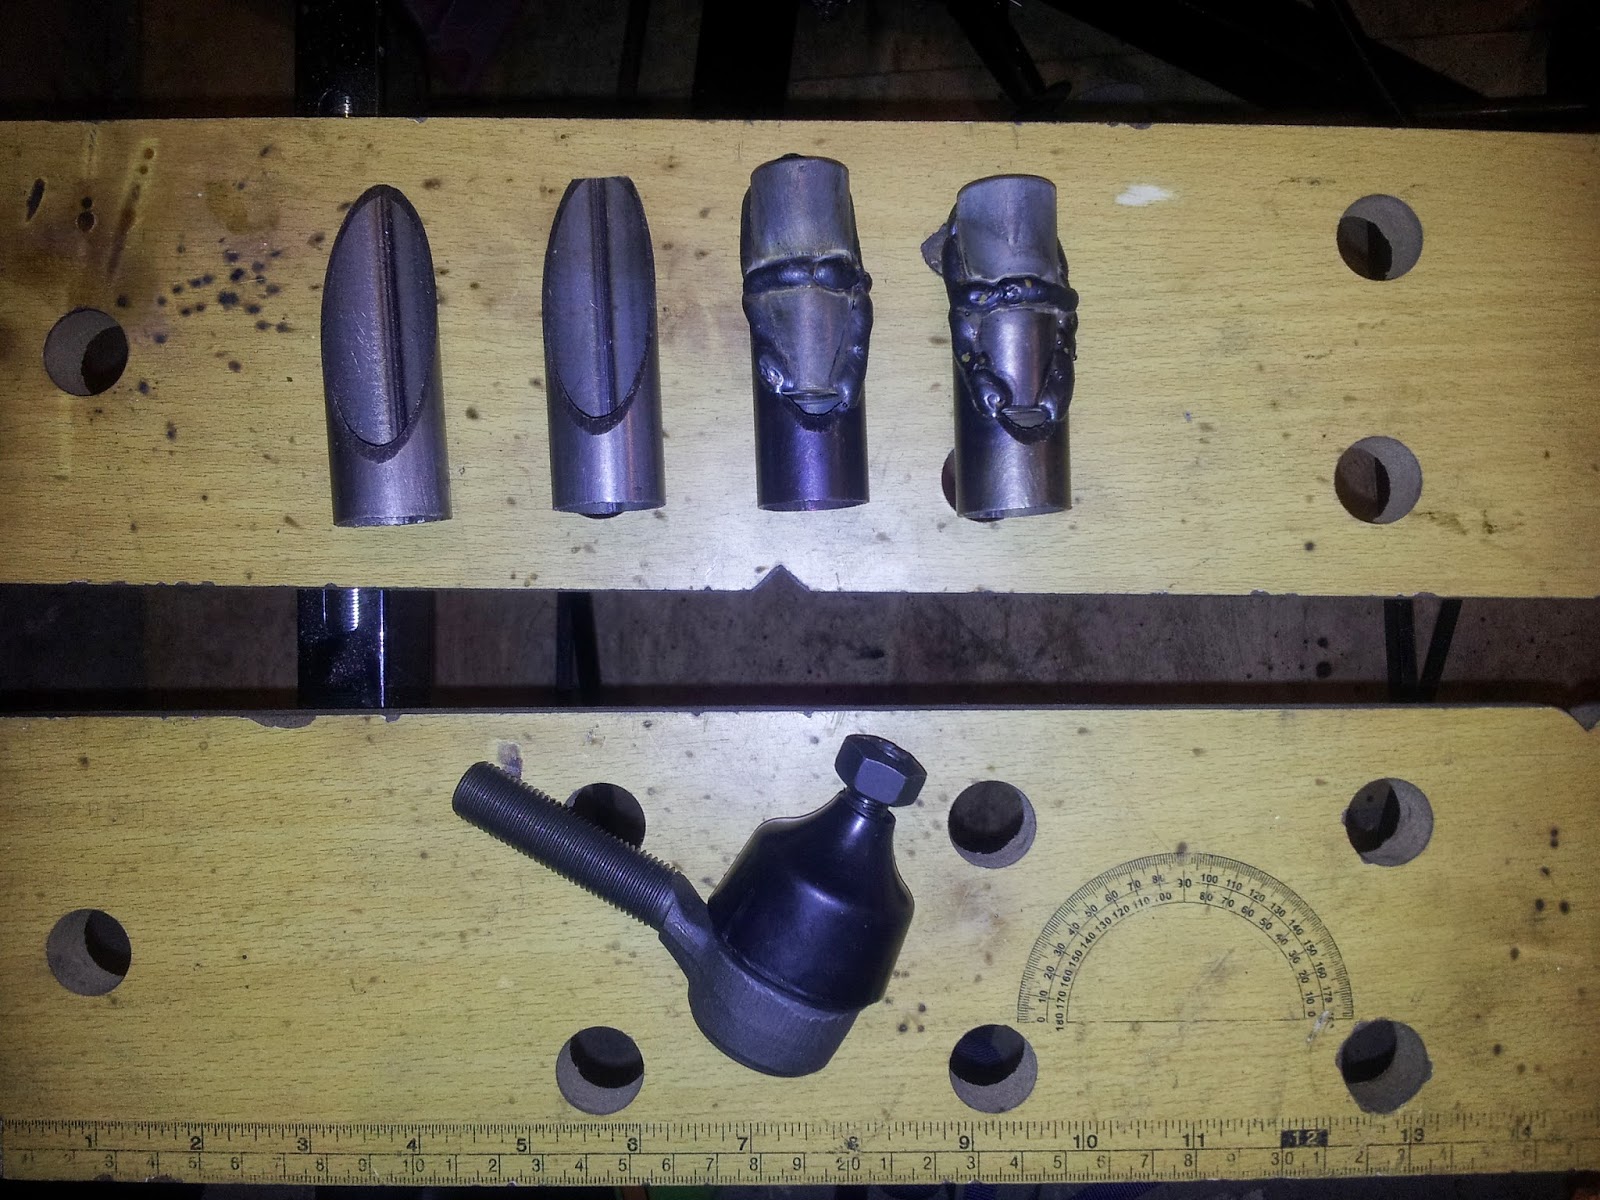
The two on the left are bare offcuts, the two on the right are the inserts welded into place. With them fully welded as they are, the BMW balljoint still fits perfectly. Tomorrow I'll grind down those welds, and put the other two offcuts on top. Once they're welded on, I'll have a completely sleeved insert with good welds holding it tight. It's still only 50mm long (the original plans call for 60mm) but the threaded part of the balljoint is only 50mm long so I'm not worried.
Next were the tubes themselves, just cut to length and then manually profiled to the bush tubes;
As the lower wishbones aren't handed, I did them all using this jig. That way I knew they would all be identically right (or identically wrong!). The plates I had cut for other parts of the suspension came in very useful as spacers, I kind of ignored the spacers suggested as it didn't leave all the seams in the centre. And when I was welding I wanted to make sure I was welding on welds.
Then came the bottom cut. First I tried marking it with a laser beam;
But I couldn't get it to line up perfectly, so I went for an old fashioned handsaw jig. Again, lots of hours and lots of cutting fluid later, I had all pipes cut, and a full set of parts;
A first fit showed a bit of trimming needed;
So ten minutes with a flap wheel on a grinder got them fitting perfectly. Straps and clamps aplenty ready for welding;
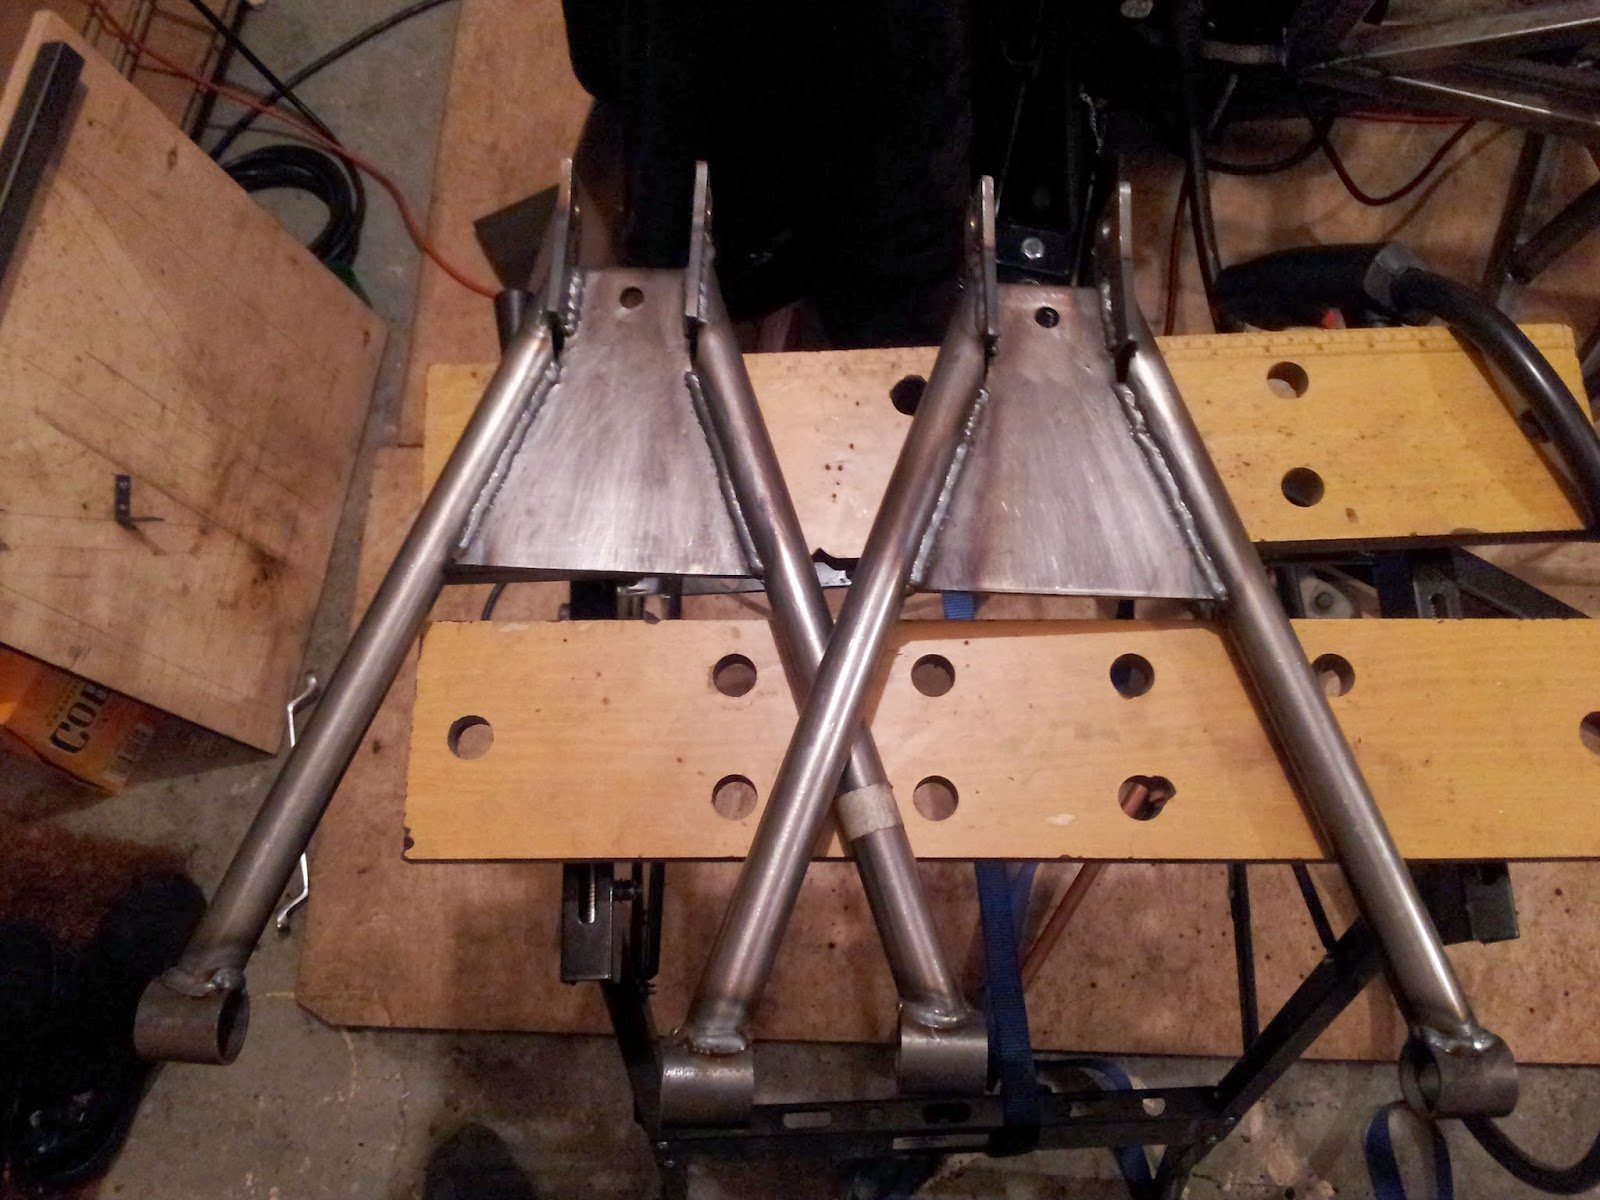
And a short time later I had two wishbones!
Putting them back to back showed that there was less than 1 millimetre difference between the bush tubes and the balljoint fixings, so I'm really happy.
I just have a couple of holes in the end of the tube to finish off, but I might pour some waxoyl in there first. It'll probably all get burnt away as I finish the weld, but at least things will stay rust proof.
The cut tubes left an interesting profile, which got me thinking about the next stage. I need to sleeve the threaded inserts for the top wishbones, and I was advised to cut the sleeve at an angle to maximise the weld length. As it so happens, the sleeve tube is the same tube I used here!! So;
The two on the left are bare offcuts, the two on the right are the inserts welded into place. With them fully welded as they are, the BMW balljoint still fits perfectly. Tomorrow I'll grind down those welds, and put the other two offcuts on top. Once they're welded on, I'll have a completely sleeved insert with good welds holding it tight. It's still only 50mm long (the original plans call for 60mm) but the threaded part of the balljoint is only 50mm long so I'm not worried.
Subscribe to:
Posts (Atom)