Thursday 26 July 2018

Extended steering

Well, the extenders have arrived, I reckon I spent all of five minutes before I had to try them on for size, and five minutes after fitting one I forgot I'd not taken a photo... here is the 'other' one;


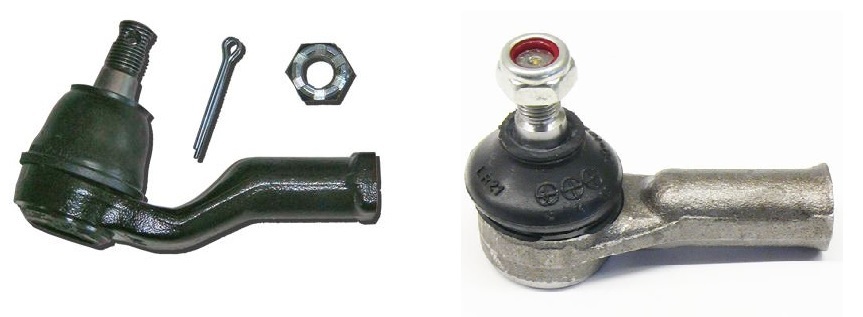
As you can see, these are really well made. The male thread is for the MX5 TRE, and the hole in the right hand side is for the Sierra rack.

It did occur to me that the steering rack lock nut was designed for the Escort rack, and wouldn't fit on the MX5 TRE. I had to refer back to the picture I'd been sent to realise the extender fully screws into the TRE (and can be spannered tight), then the female end is where the adjustment is made.

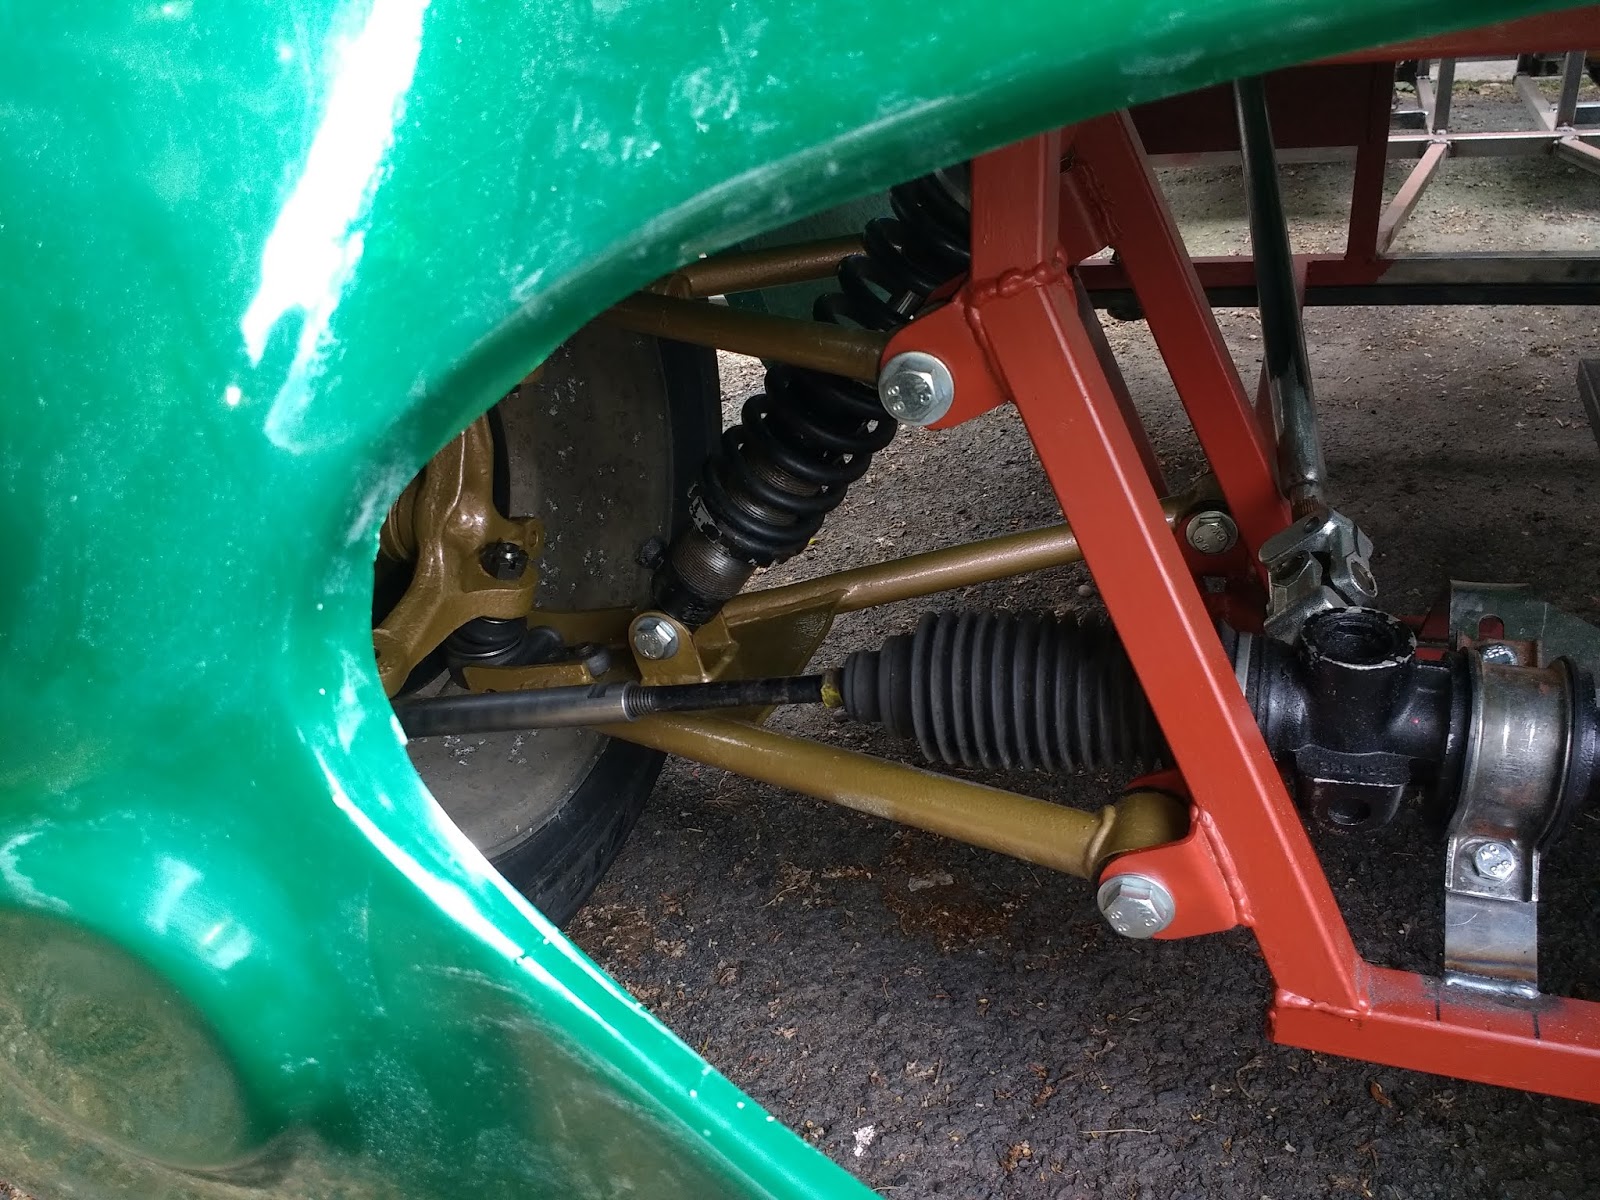
This is what I had before, the Sierra extender in place but no room (and wrong thread) for the MX5 TRE;


I wasn't going anywhere with that one. Here is the proper extender in place (apologies in advance for some of the photos, the car is actually on it's side...);


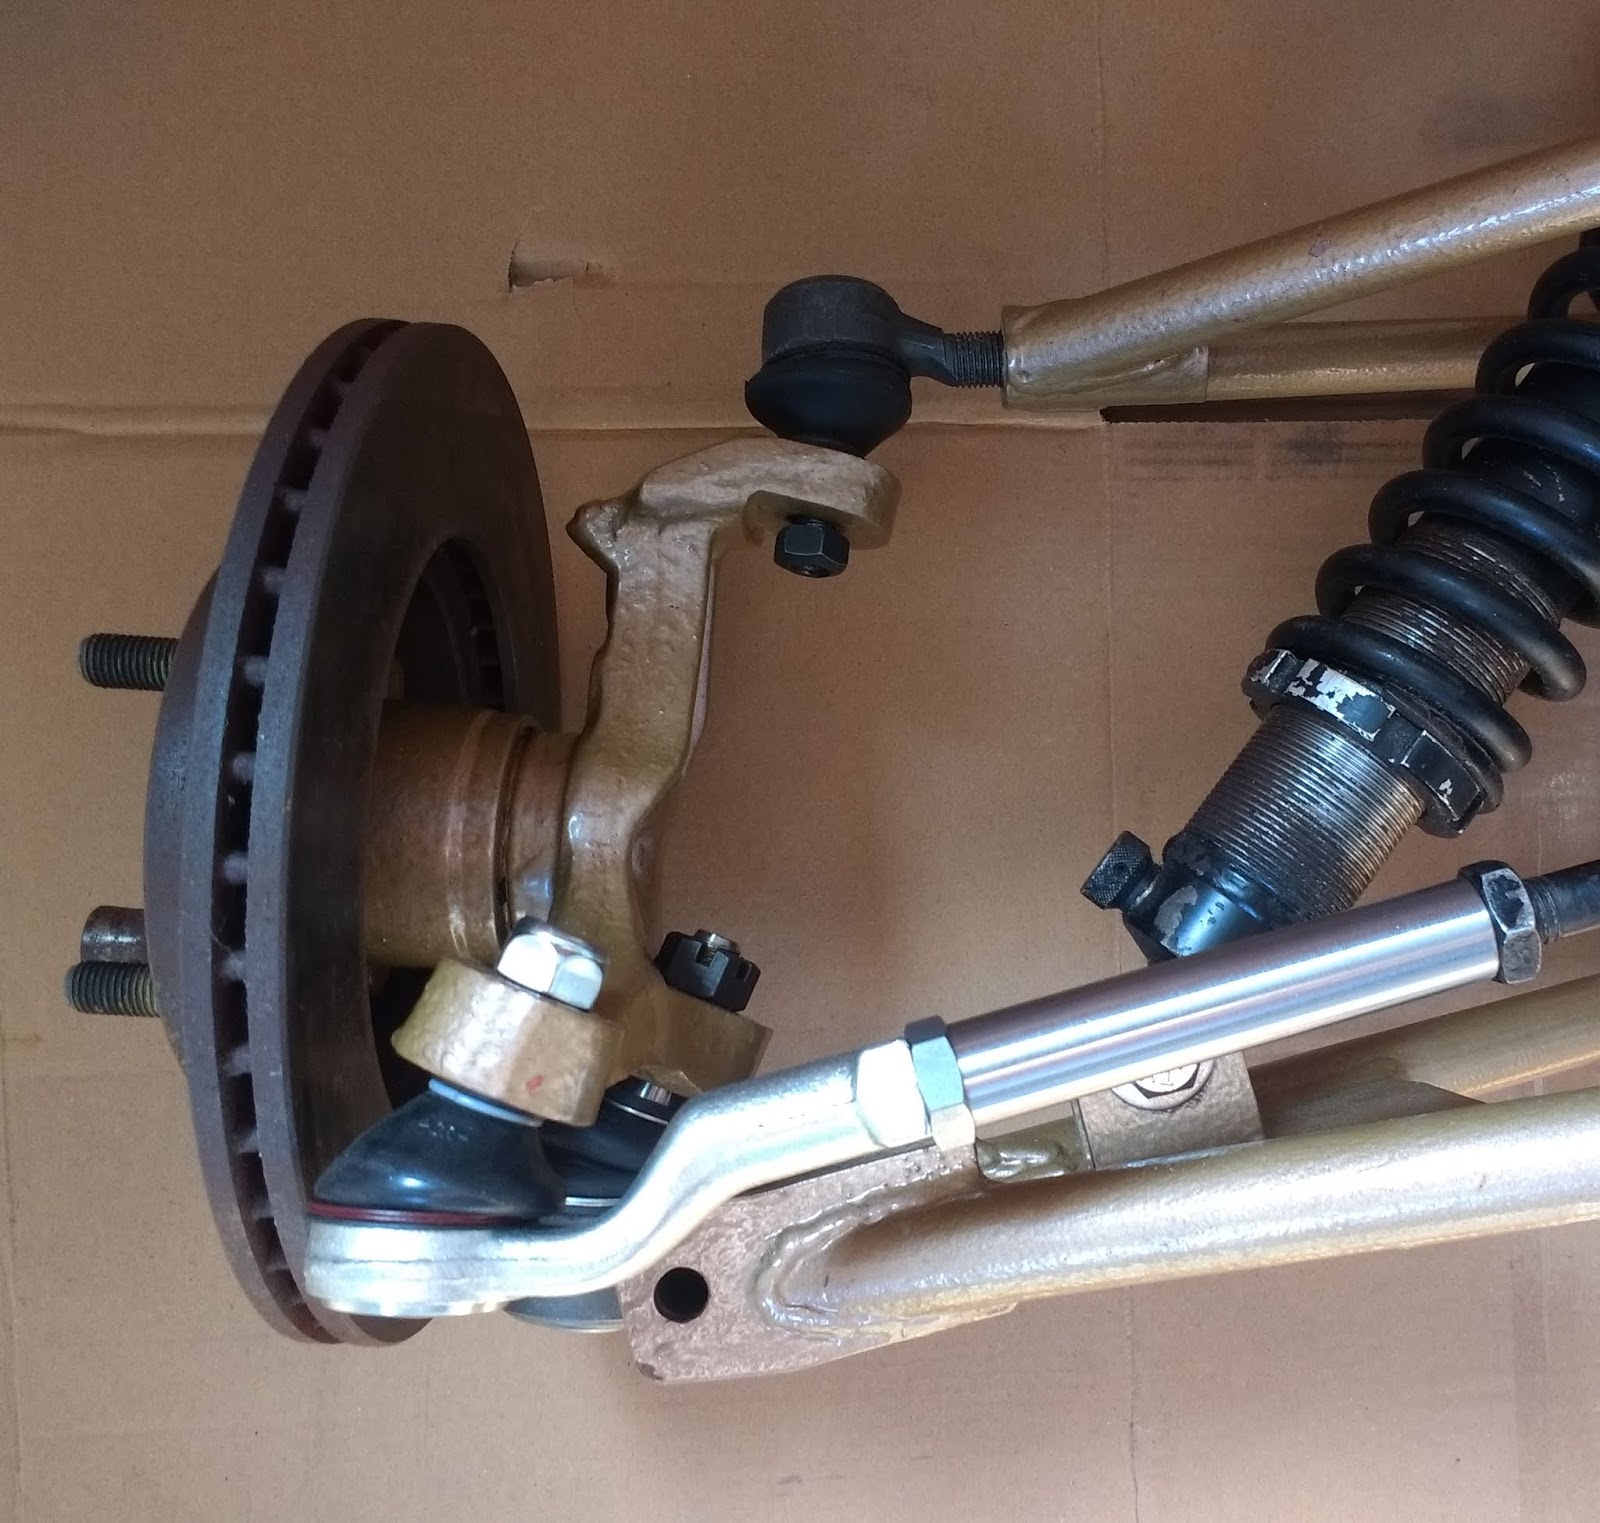
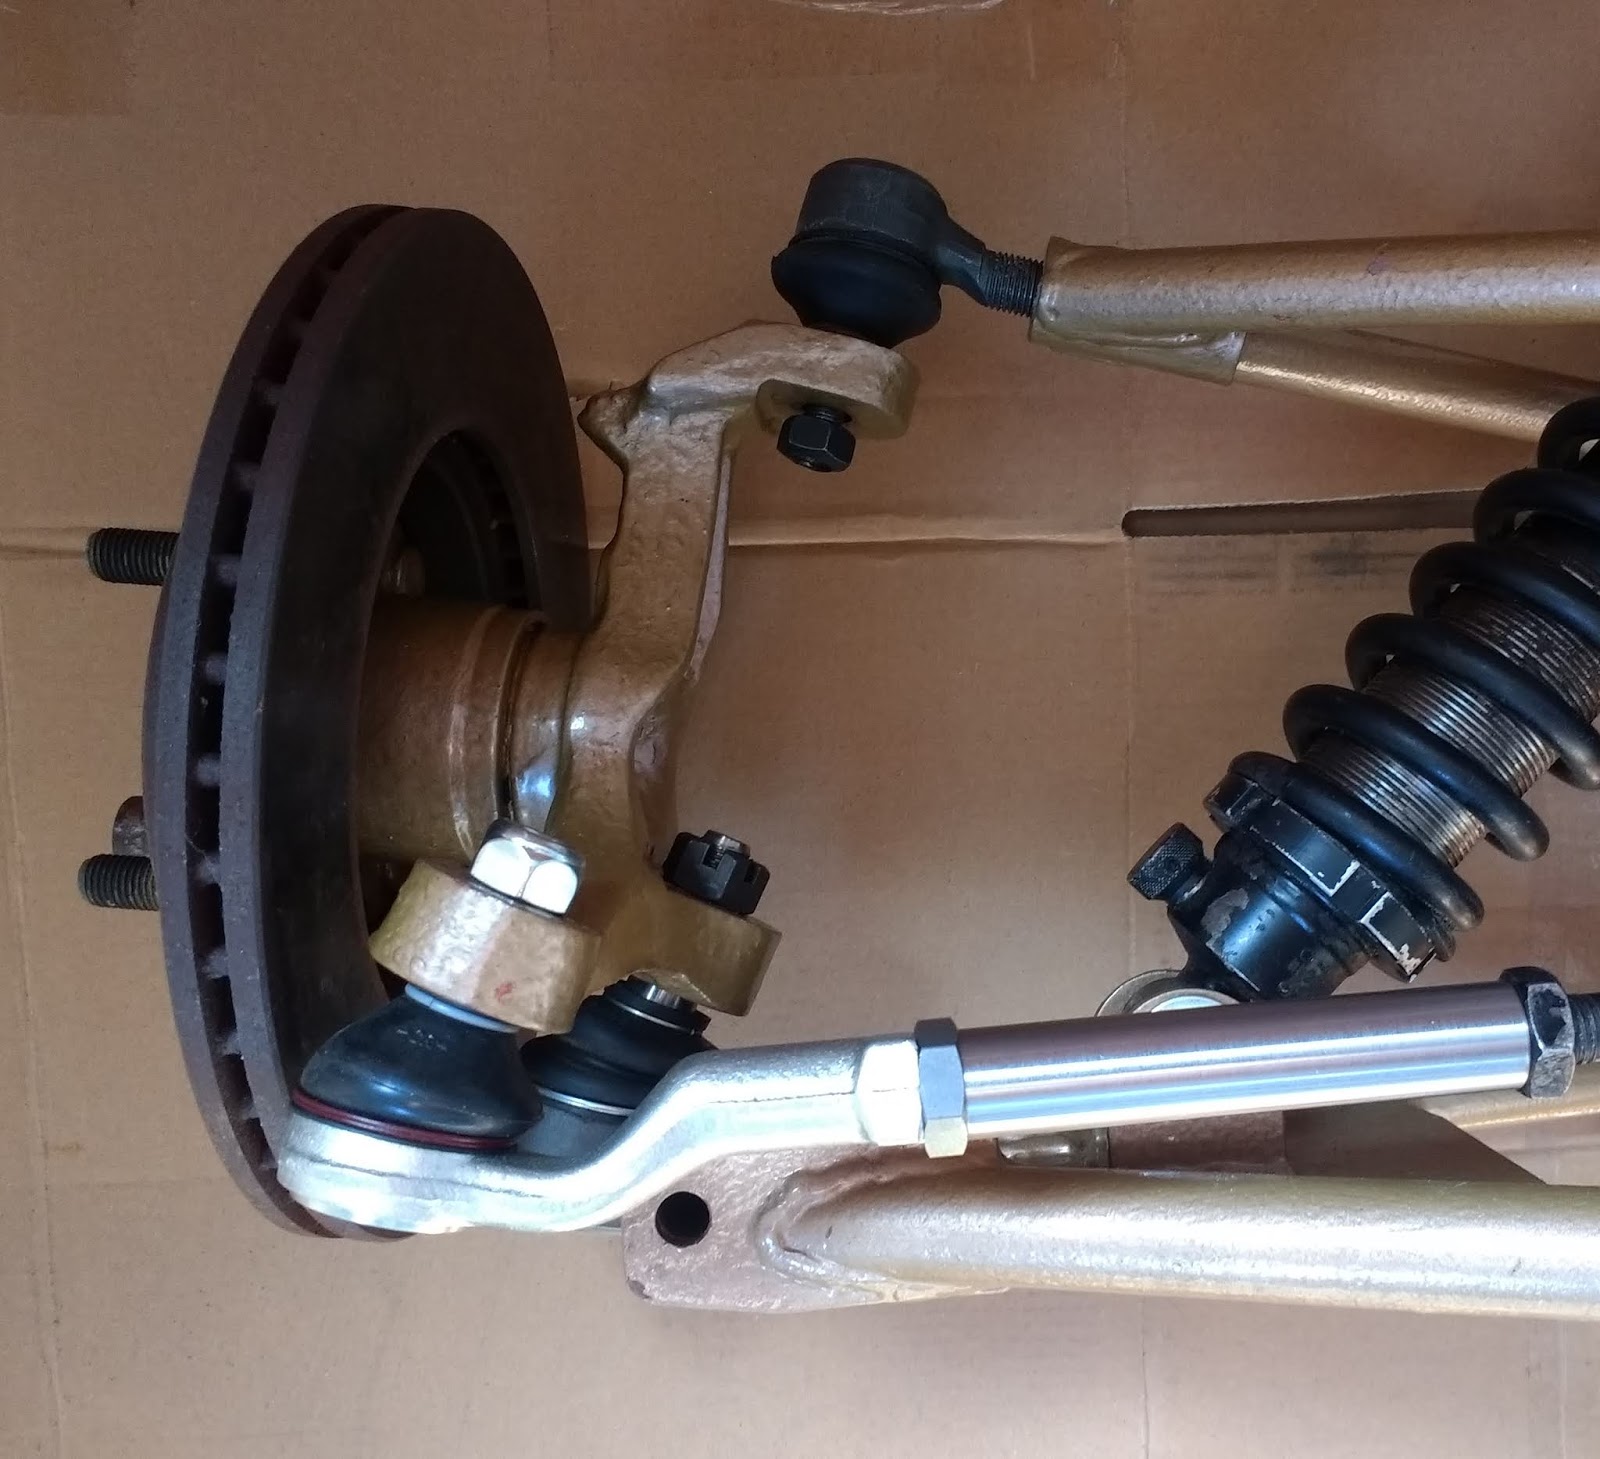
This was the first trial, fully extended suspension. The angle of the TRE does look quite severe, but part of it is the loose ball joints on all three joints, as well as the really bad camera angle. It's at full extension and not bound, which is what I wanted to achieve. This photo shows the extender tight in the TRE, with the Escort lock nut on the rack. There's about three or four threads left for adjustment, I'll find out whether that's enough when everything is tightened up and there is an engine in there.

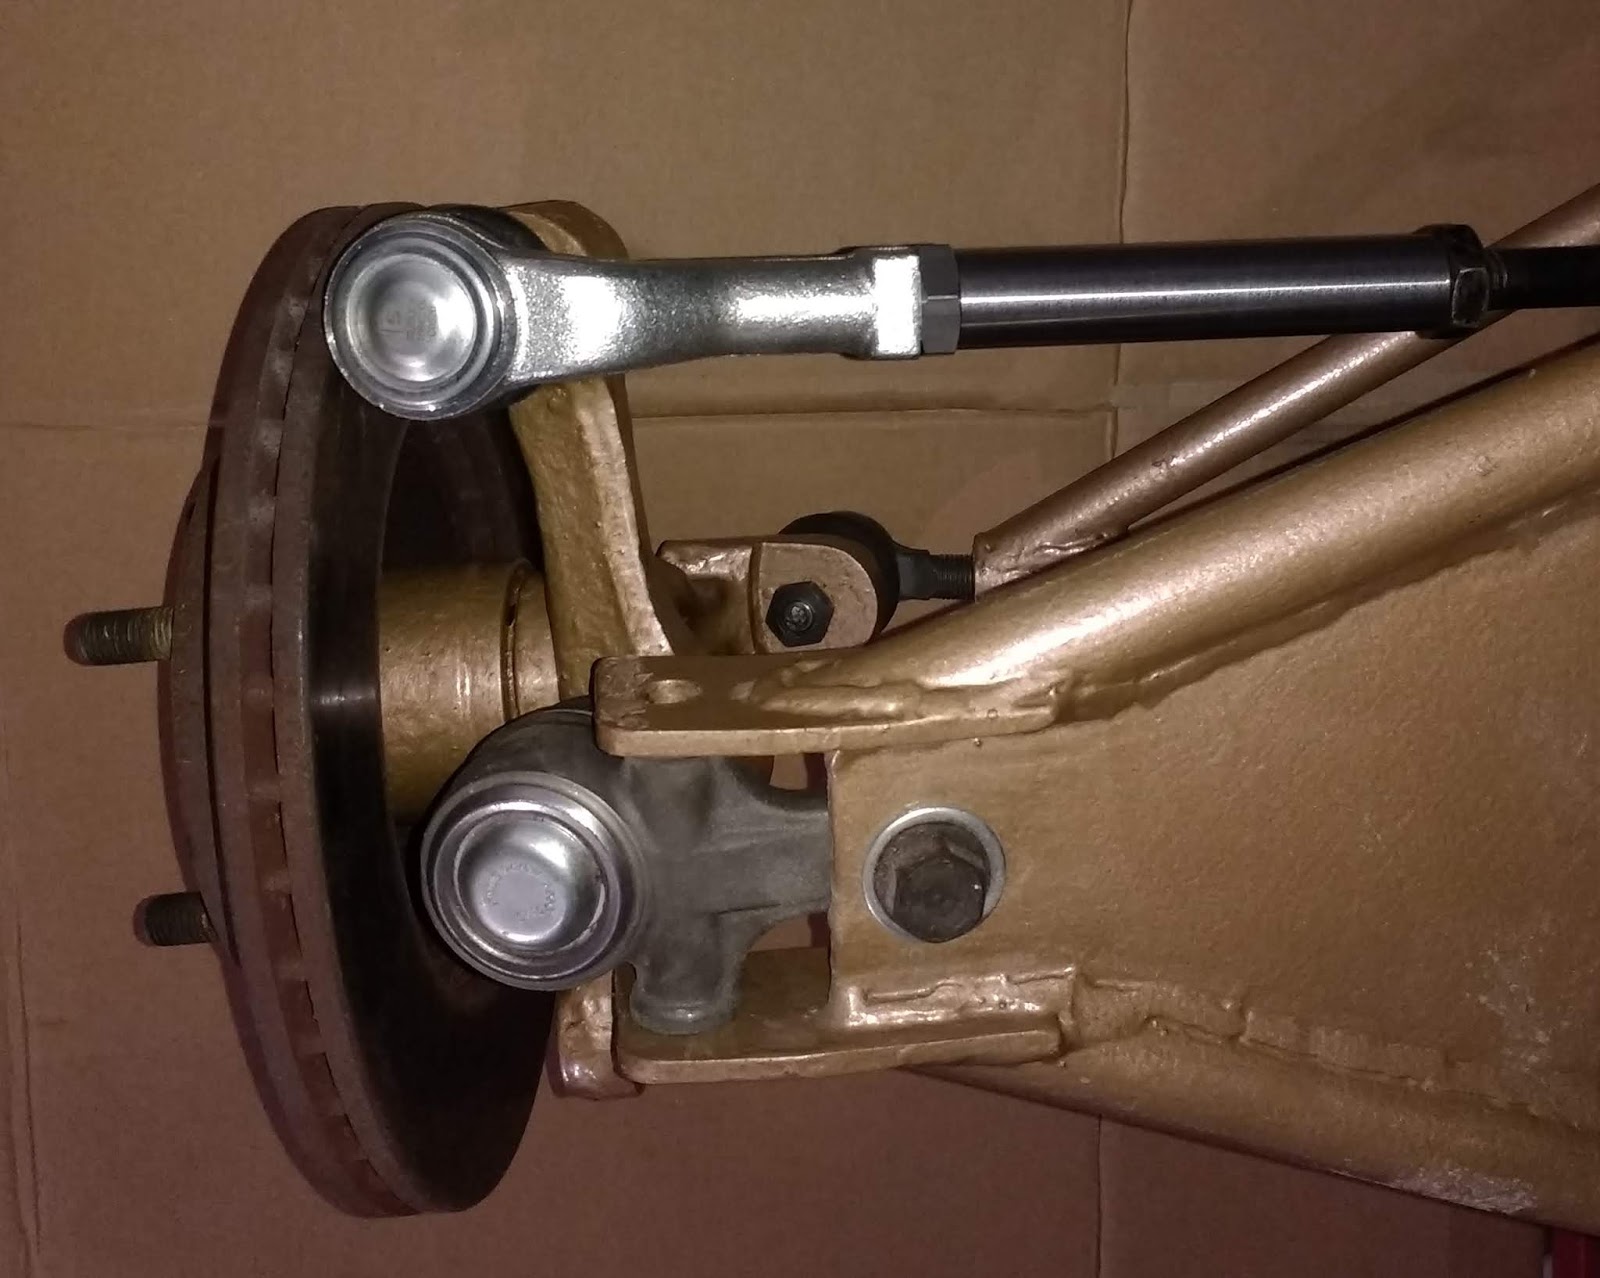
With the suspension wound in a bit (to better show a 'normal' angle) the TRE looks much happier;


Bottom angle shows how much space is between the steering arm and the bottom wishbone. This was another 'internet complaint' with the design of the suspension. Under full extension and lock the steering column would get friendly with the lower arm. I 'might' have to put some collars on the rack to reduce steering lock but I'm fairly sure there is enough room.


So there you go, a tiny (but very important) cog in the whole machine. I have to send out a huge amount of thanks to thelatheman, the amount of time and hassle he's saved me is brilliant. I started this build with the idea of it being locost, what I should have aimed for is 'best value', and these extensions are definitely that. 

Next time, back to the bodywork...

Tuesday 10 July 2018

Seat fixings

Let's talk seats. Since the start of the build when I got my donor, I knew that I wanted to reuse the seats. They were from the V spec edition MX5, and they are a really old brown leather with a decent level of wear. Not only would they suit the Healey, their age and patina would also work perfectly.

This meant I had to deal with a few things. First off was mounting them. Fairly easy, just straighten the sliders and bolt them to the floor. That was one of the easier problems I've had so far. Next step, the width of them. Again, not a huge problem, at least for the squabs.

The issue came from the hinges. The seats were adjustable, in that the seat back could be tilted. This mechanism was a good inch or so wide on either side of the seat. But it wasn't going to be used in my car, the seat back had a limited range of movement in the first place so fixing it at a specific angle seemed to make sense. After removing the mechanism on both sides, the front and base fitted no problem. But of course they were now separate pieces.

The solution is for me to use two cut pieces of metal that mimic the original hinges. These will be made in an L pattern, and cut and drilled in the same place as the hinge. I'll also reuse the screw holes in the back and base, and that should give me a seat that is properly secure but still able to fit in the relevant place on the car. I do need to make sure that the seatbelt routing takes into account the seat back as there are certain restrictions on shoulder height etc. Basically the seatbelt shouldn't need to rely on the seat to provide restraint, the loading forces should go straight from the person to the seatbelt anchor/mechanism.

On the subject of seatbelts, I want to use the donor seatbelts. Again, they're a nice match although a little less wear than the seats (thankfully!). The problem comes from where to mount the reel as it's quite large. Mounting it to the welded mount is a no go as the seat would have to be a good foot or so closer to the wheel to get it to all fit, not a chance.

My first thought was to mount it to the diff cage, then use the donor belt guide to bring it over the drivers side left shoulder. This would work quite well, it would keep everything in the right place and the reel would work as it should.

But there is an option, I could mount it outside the frame to the original welded mount. This wouldn't work with a seven as it would be on the outside of the car, but since I'm building a Healey it will just mean that it's between the frame and the body. Which will work fine!

TRE's


OK, so lets talk track rod ends. When I was building my roadster, I knew that steering was a challenge. Lots of options had been explored, and every conversation always ended up with 'mark 2 steering rack'.

On the flip side, there was a healthy market for second hand racks. It took me about a week of searching on Facebook marketplace and in the various Locost groups to find someone local to me who had a spare rack. £50 and 10 miles down the road, and I had a remarkably good condition rack. It needs a lick of paint (and maybe new bellows if I'm really picky) but a bargain nonetheless.

Next step, extensions. Now this is where it gets tricky. The normal practice for the Sierra based car is Ford TRE's, but the rack is nowhere near wide enough. The book talks about some 150mm extenders, so I got straight on that and bought some. £15 and I had them in the garage.

Fast forward to last weekend, and I found a flaw in my plan. The rack plus extenders could actually get to the upright holes, there was no space for a TRE. Fail number one...

Turns out there are shorter extenders needed, so I set about figuring out how to shorten them. But then I found another post, cue fail number two...

Shorter extenders would have only got me halfway. The MX5 uprights have a quite severe angled tapered hole for the TRE's. If you use the standard Ford option (which are right angled), then the general consensus is that at full droop, the track rod gets caught between the upright and the lower suspension arm, and the TRE reaches it's maximum angle. Either of these could result in damage or break. Not good on suspension or steering components!!

So while fail number two was imminent, I'd finally managed to catch up with myself and not fall into that particular hole. The solution is to use an MX5 TRE, these are angled in the same way as the upright. This means that at full droop, the TRE isn't at full travel. This is how the MX5 (left) and Sierra (right) TRE's compare;


The difference in angle is quite plain to see. The only thing is, the difference in internal thread isn't so plain to see!!!

Yep, although I had an Escort rack, and Escort extensions, they won't screw into the MX5 TRE's. What's more, as I mentioned above the Escort extensions were too long. I couldn't have used ANY TRE let alone an MX5 one.

Then I found out about thelatheman, an Ebay seller in Lancashire who does lots of custom lathe work. And what's more, after asking him whether he could do what I want, he actually pointed me to an Ebay item that was exactly what I was after! It was a shorter extension, with an internal thread for the Escort thread, and an external thread to fit the MX5 TRE. They are a bit more expensive (£37 vs the £15 I paid originally), but since it's the best/easiest/quickest option, it was a no brainer really. So I'm now just short of £60 lighter, £21 for a pair of MX5 TRE's and £37 for the extensions. Fingers crossed they arrive by the weekend and I can try them out.

Trial fit for suspension and bodywork

Now I've got my HSR body (woohoo!) and my bike has been sold (boohoo!), I can finally get round to fitting the body and seeing what work needs to be done. And to be honest, it's looking quite good...


This is the narrow body sat on an SSC based MX5 roadster. It was easy to see what work is to be done, mainly around outriggers to carry the base of the bonnet, a front mount for the hinge, and maybe some bracing along the trailing edge. As you can see on both sides the wheels stick out, this was more or less what I expected. There's a few options here, either attach some fender extenders (chrome ones would be very interesting), or swap the wheels for something with a lower offset. I'll deal with that afterwards though, at the moment I'm just happy the positioning is good.

In this pic there is a piece of metal going from left to right that is clamped under the chassis, and another at the front doing the same. These will be where the outriggers are going to sit.


This is the height of the bonnet when the bottom edge is in line with the chassis (you can make out the clamped bar to the right of the picture). Having said that, it's the rear shell that needs to be put in place first, I've not been able to do that purely because the chassis isn't finished.


It's certainly an interesting view from the drivers seat!

I also trial fitted the suspension, front...


And rear...


I'm glad I did this though, as I wanted to make sure I had everything available. Basically I have a bag of nuts and bolts, and as I build things I've been using the fixings to test out how everything goes together, then taking them apart and putting them back in the bag. The only problem is that I've double used some of the bolts, so when it came to put everything together at the same time I was short of quite a few bolts!!

So, in no particular order, here are my new 'to do' items;

1. Buy TRE's. I spent so long tracking down the front upper suspension arm track rods that I forgot the steering rack needs them too!!
2. Buy proper extenders for the TRE's. This one is an interesting one, I'll talk about this in the next post.
3. New bolts for the rear upper suspension mount. The block in the picture above holds the upper rear suspension arm, the MX5 upright, and the suspension coilover. Problem is the bolt that I had available doesn't go through them all. So I need a new pair of bolts for that. 
4. Diff bolts. As mentioned, I've used these diff bolts in several places, so I now need some for the actual diff!!
5. Steering rack fixings. Same again, double used.
6. Seat fixings. OK, they're not related to this, but I had to get some. That will be in the next next post.

Overall I'm so impressed with the bodywork, there's plenty of room available for the engine, I don't have to worry about radiator fittings, and most of all I won't have to deal with some of the sharp edges that most seven's have to sort out for the IVA. I have different ones to sort (I already have scratches and cuts from the body itself) but I'm hoping there will be less of an issue.