On to the new seats. As mentioned before I'm making a frame, that will then be filled in with plywood and surfaced with foam before the leather goes back on. First thing, another delivery from the Metal Store;

I highly recommend the metal store, it's just convenient compared to local stockholders. The prices are a bit more, and you have to make sure to get it above the minimum postage limit, but that doesn't take much.
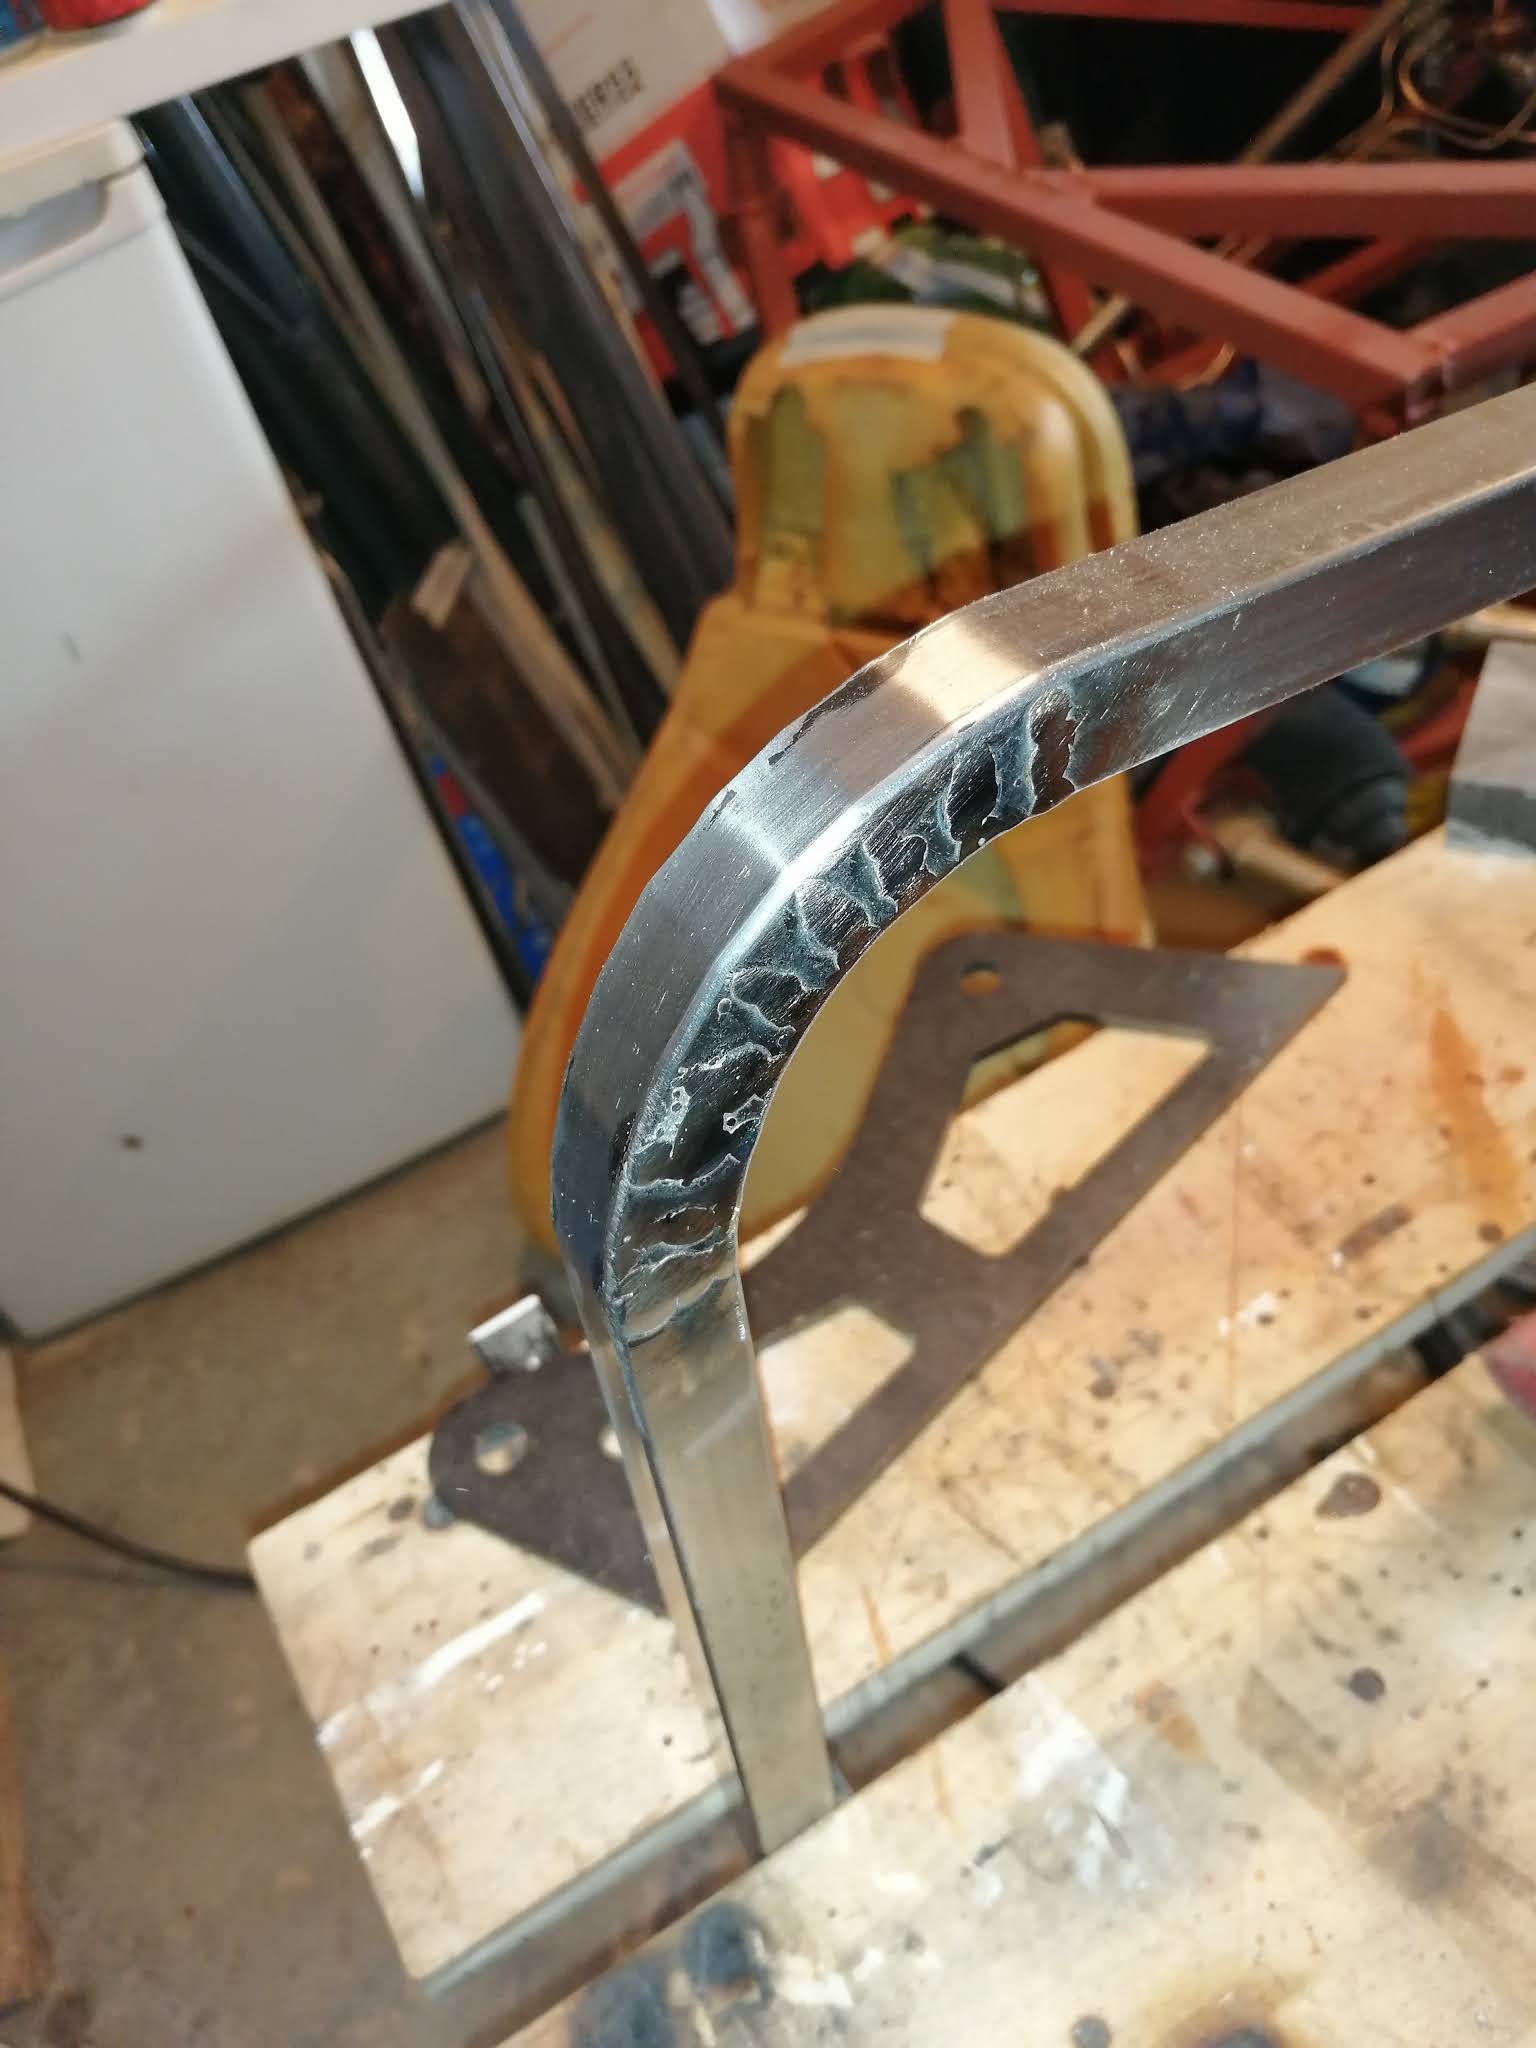
First thing is that I wanted to bend the corners. After many webpages and youtube videos, I decided that it wasn't going to just 'bend'. So I went back to my 'segment' approach. Basically cut slots on the inner side of the bend, bend the metal and weld it up.
This is after a cut, bend and tack;

After welding (and a fair bit of blow through!) and clean up I had this;
I then continued with the others, and of course they went much better the second time (and the third and fourth time);


So these are now ready to be welded up.
Next part was the head rest. This is the hardest bit as it's a full 180 degree turn in a fairly small area. First, the wood template;

This takes the outline of the leather seat, note that it's not symmetrical. The Mazda seats actually lean into the centre, presumably to take into account the roof. I'll be doing the same with mine.
Next was to find the cut positions. Each cut is 12.5 degrees, so there's sixteen cuts to do. And because it's not a perfect semicircle, I had no chance of drawing it by hand. Therefore I scanned the above picture into the computer and overlaid it with segments at the relevant angles;

This gave a good match to the outline, and as you can see the sections are very different lengths. At the 2 o'clock position there's two cuts that are only 2mm apart, this is to get the correct curve.
Once that had been designed and printed out, I could then follow the same process and cut the slots to make the curves;
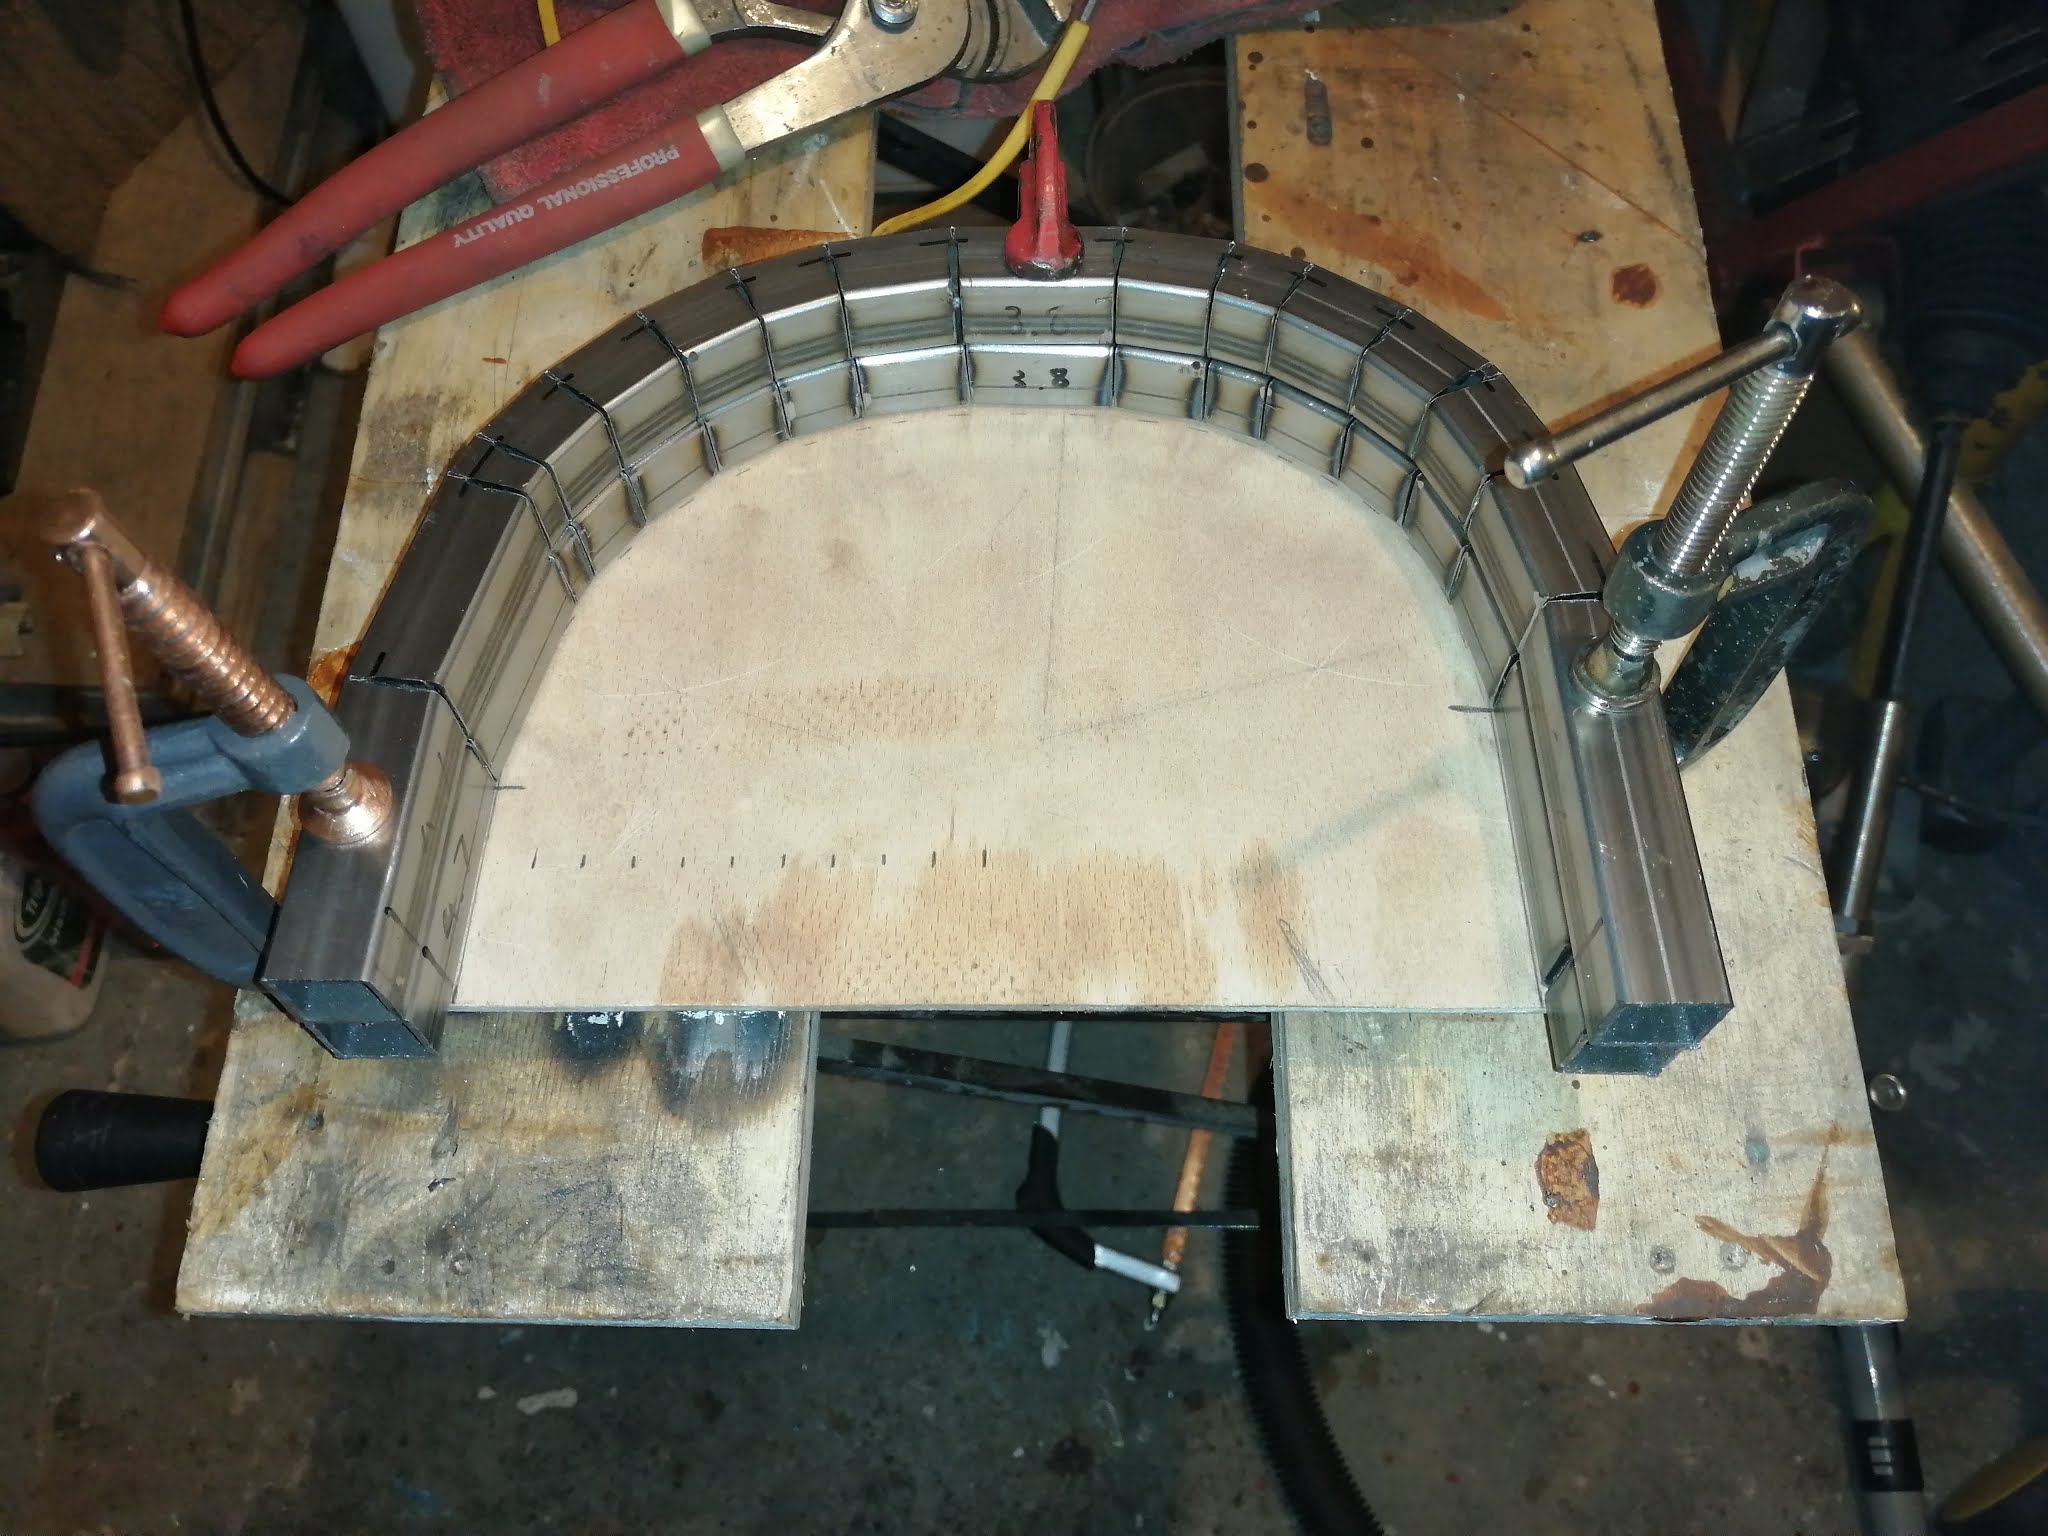
Overall I'm happy with how they've come out. Some of the gaps are bigger than others but as long as I'm careful with the tacks then it'll work out fine. Obviously they're overlaid against each other above, in the car one will be flipped to get the balance.
This all took around three evenings, and I was really tired by the end of it, so I've not made any further progress. Having said that, it's only the seat-back sides that are required now, which are much shallower angles. I think I can achieve the sides with only one or two cuts, which is a whole lot easier.
Then it'll be drawing the outline on the plywood and cutting the pieces out. Once that's done and mounted I can then add foam.
I do need to work out the seat runners. For IVA I want to put the seats quite low to avoid the seatbelt, so I'm having the seats fixed for the time being. But the bars in the chassis were for the MX5 adjustable runners, so more metal is needed. And more fixing. Not a big problem though.