Monday 25 November 2019

Aluminium edge trimming

As I was cutting the car panels, it did occur to me that my target of beautifully clean corners and edges had the unfortunate side effect of surrounding the occupants with lots of lovely looking aluminium razor blades. Indeed, the state of my hands after cutting the panels just shows how badly I'm going to injure myself just getting in and out of the car! And that's even if it gets past the IVA, which it won't.

So there are a few alternatives. The first is probably the easiest, some right angle plastic trim along the corners. Lots of cars do it, although for some reason I can't find a picture of one when I need one! The main thing with this is that it's applied at the end, so this is basically a fallback strategy. It's not a bad strategy, just not what I'd put as the top priority.

The next option is some edge trim. This is applied to the aluminium then the panel is riveted as normal. There are two problems with this. One, the panels will no longer fit flush, and considering the tolerances I've been working to are pretty tight, I think I'll actually have trouble fitting the panels. The other problem is damage. No matter how careful I am with the car, the trims are going to get scuffed and damaged. If I have some trim that is fragile but riveted in place, it doesn't give me much scope for repair. And that's if I don't damage it on the way in, after all the rivets apply a fair amount of force and the plastic might deform. So this option is off the table.

The 'correct' option for this type of car is vinyl on foam. This would certainly solve any sharp edges, but to be honest I just don't want it. Carpet is similar, I could get it trimmed pretty decently but it's not what I want. I'm going for a 'raw' version of the Healey, very stripped down and ready for the (theoretical) track.

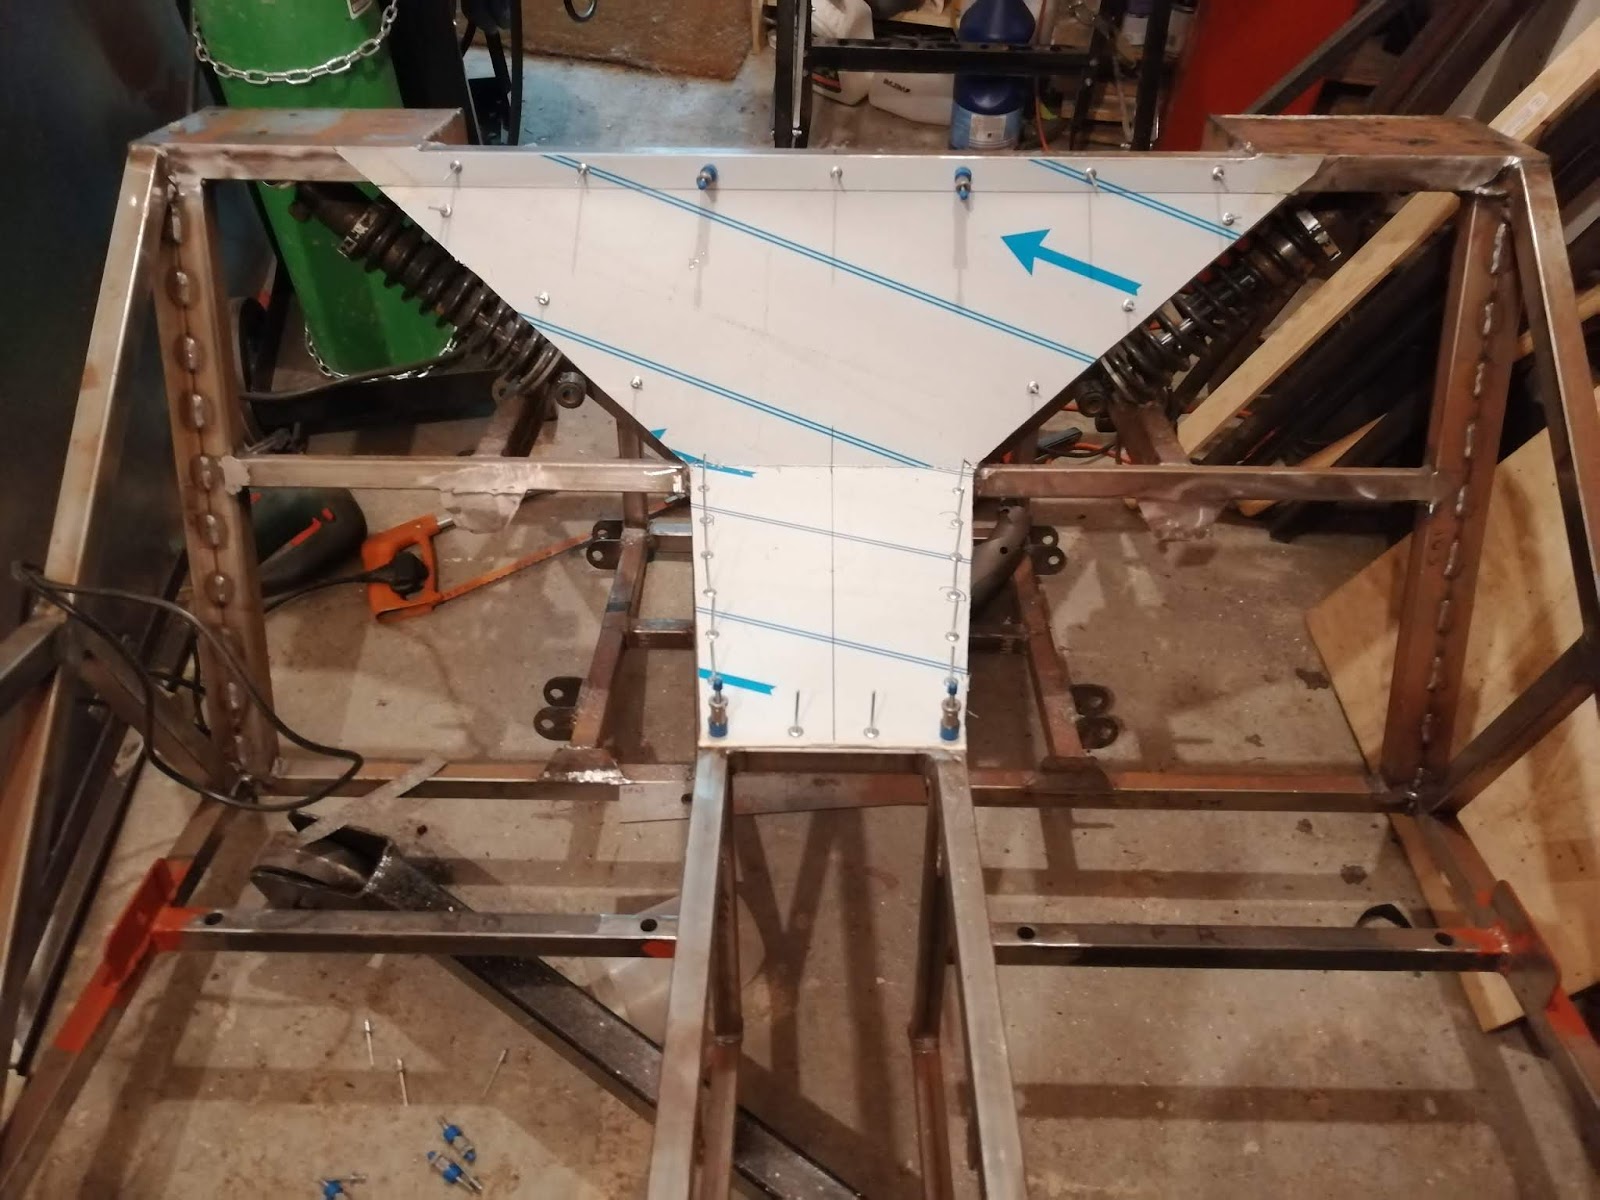
The last option is one that would give the best result but would be the hardest to do. Other cars with aluminium interiors rely on the curved surface of bent panels to provide the rounded edge. For example with the side panels the top of the aluminium is beaten over the top rail. This means that the radius doesn't need to be large in order to get rid of the sharp edge.

Based on this Youtube video;


I was wondering whether the same approach would work. Speaking to the author of the video though, he suggests that the cutter would just 'dig in' to the aluminium, and leave me with a mess. However, he did suggest a scraper approach might be better, so basically the same device but with a vertical blade.

The cutter itself will be a 90 degree, 2mm rounded edge. Using the tool steel I bought, this means I'll need a 4mm hole with a slot leading to it. The slot needs to be wider than the aluminium as I don't want the edges of the steel to touch the surface of the sheet. This will be fixed inside a wooden block similar to the above, with the wooden block having a 2mm slot to hold it in position. Hmm, maybe I should 3d print it...


Sunday 6 October 2019

Engine mounts

The next step was to put together the engine mounts, and all I had was the MX5 mount that I wanted to reuse;


Rather than weld some metal together, I thought some proper design might be good. So out came fusion 360! I replicated the engine mount itself, as well as the chassis bar, then virtually welded some metal together.


I think this will be plenty strong enough, with the bar at the bottom being the chassis, some 3mm plate on top, then welded 25mm bar going to the engine mount. A couple of 3mm fillets to reinforce it, and those mounts will be strong enough to carry an engine.

But for once I thought I could go one step further, and make a real one;


I did figure out that 3D printing doesn't like geometric shapes, but a 50% print made it quite apparent that the strength is there. I don't think I can cut it down, but I also don't think I need to reinforce it anymore. It also shows I can get to the mounting nut, and I can see how to mount the whole thing to the chassis. 

I can start cutting and welding a real one now! :)

Tuesday 24 September 2019

Gearbox bush

Just a quick one for now, the gearbox bush. After trying to figure out what words to google in order to find something suitable, I finally managed to find 'Landrover V8 engine mount'. A bog standard round bush with two threads either side for fixing. It'll be working under compression, and I just need a bit of angle iron to fix the mount to the car and the gearbox. Nice and easy... :)

Sunday 22 September 2019

Clearance around the engine

The other side of getting the engine in is to see how much clearance around the engine is available. This is quite critical as I don't want to be fitting pipes and other stuff where the engine goes. Fortunately, it looks like there's plenty of clearance all round;


In fact, the only slight issue will be the clutch master cylinder. It's a bit tight. But then again, so is the Saturn picture example, with the pipe from master to slave being about three inches long! With a bit of lateral thinking I could convert it to a manual clutch very easily... I won't, but I could.

The other main tight point is where the gear shift is;


But even that isn't that tight. The pipes and electrics have to come below the cross bar anyway, then the fixings are vertical so I can put them in any combination and they'll work fine.

I do need to figure out that reverse switch, every picture I look at with it in shows that it's awfully tight.

Well, that is it for this weekend. My back, arms and legs are absolutely worn out so this write up is the only 'car' time I'll be doing today.

Engine mounts

The main reason for getting the engine in is to sort out the engine mounting. I couldn't find much information for reusing the standard mounts, with most using a solid mounting or at the very least the standard landrover rubber mounts.

Of course, I didn't want to do that. The standard mounts look really well engineered, and with a metal case around them that is bolted to the chassis I did think they could be reused very easily.

Once the engine was in place and the sump was 1 inch below the frame, I had this on the passenger side;


And similar on the drivers side;


They were in a good position relative to the frame, so it seemed like I was on to a winner. Next job was to make some cardboard templates for the profile. I only need to get them in relation to the frame, so this is what I came up with;


This is for the drivers side, there seemed to be a slight angle to the mount so I did a front and back one. But then the same task on the passenger side only needed one. They're also very slightly different angles. But I can check that again when they're off the car, as the part that bolts to the engine is meant to be vertical. I've also marked their destination on the frame.

The plan will be to reinforce the frame with some 1 inch RHS, then build up the existing box for it to bolt down to the frame. Similar to this;


But this doesn't reuse the box so I'll have to tweak it. I'm also confused why the middle of the bar appears to be missing as that appears to significantly weaken the frame so I won't be doing that!!

More on that later when I build them up. Now the gearbox mount. The one picture I saw reused the PPF bolts along with a metal plate on to a rubber mount;


This seemed like a reasonable approach, but when I fitted the engine I found an alternative option that would work in a similar way but perhaps be easier to implement. This is the bracket that I'm talking about;


The gap from the bottom of the bracket to the frame is 23mm, with the centre of the bolt hole being 28mm from the front plate (and 20mm from the front of the bottom bar, which considering the two distances should add up to 44 doesn't quite make sense but it's close enough!). If I can make up a bracket to go from the frame, through a rubber bush, to the two bolts, I should be able to get everything in the right place and secure. It'll need to be bolted from below, as both sides will be filled in as soon as the aluminium panels get fitted. I'll double check all that as I may need to use a slotted hole to keep things easy to align. Oh, and the two holes are evenly spaced from each other across the centre line, so without that bracket I should be able to centre the engine a bit better.

So that's three more chunks of work that I can complete which is good.


Next job... engine!!

OK, I did say the next job was brakes, but the stars aligned for probably the last time in the year. A free Saturday, sunny weather forecast, so I finally got to get the engine in.

First thing then. I mentioned a while back that the documents talk about a cross member that needed to be removed, but I couldn't figure out why. Well, now I know!! It took about five minutes of moving to realise the engine was not going to get past that particular lump of metal. It didn't last long with the angle grinder, at least to a point where the engine did fit. I need to tidy the ends up and cap them off, but that's an easy task.

A few photos to start then. This is the engine mid-flight, with the offending bar still in place;


Once that was out the way the engine went into place quite easily;


Unfortunately I forgot to take a wide shot, but then again I was doing this for positioning rather than pictures.

On that subject, there is a fair bit of space available. One comment was that the steering column needed a notch cut out of the inlet manifold support. Not for me though, I think it's because I had moved the steering column to give me the 10 degree angle;


Although I wasn't sure why the steering column was resting against the chassis vertical. It could be because it wasn't bolted tight, but even if it shifts when tightened up I still have a bit of space available. 

The tightest area was the transmission tunnel. With the engine mounted as far back as possible, I had this left;


I'd say maybe half an inch gap on the drivers side, and zero gap on the passenger side. That reverse switch will need protecting or possibly the panel 'adjusting' to compensate. But the gear shift is in a nice place;


It does appear slightly off centre here but that's because of the lower bracket. And on the subject of the lower bracket;


This is the offending part, this is stopping the shift and the prop from being in the centre. But it's also a fantastic place for the front gearbox support. Once that plate has been removed, I have two chunky bolts going into pretapped holes, all just begging for a custom bracket leading to a rubber mount. This is similar to how the Saturn plans describe it, but theirs is a hard bracket and I'm not happy with that.

All in all a really good day. I'm not going to put much else into this post as I need to separate out the information. Time to get on to those then.

Sunday 15 September 2019

Next job... brakes

Time to crack on with the brakes. It's reusing the split system in the original MX5. This is a three outlet design, with the two fronts on individual lines, and the rear on the third. The rear also includes the brake light switch before heading off to a T junction mounted behind the diff. Once there, each side gets an individual feed.

The fronts come out of the master cylinder on to the two lower rails just in front. From there they run along the rails until they get to uprights U1 and U2. Then it's to a bracket that is welded to the top of the upright, and a flexi finishes the route to the caliper.

Rears are similar, although with the brackets I've installed they pipes will actually come up to the top of the tunnel first, then routed back to the T piece which will mount on the back of SB3. Then it's off to either side, again staying above the suspension to arrive at a bracket, then a flexi off to the caliper.

So first job will be to find the master cylinder (wherever I put it!!), fit that and the T piece in place, then weld the remaining brackets in place. Or thinking about it, I'll need to weld a bracket in place for the T piece!

Time to get started and see how far I can get in a day.

Jobs list

I don't like doing these as it makes me realise how much work is still to go, but it's got to be done.

In no particular order;
  • Fuel tank mounting bracket. Normally there is a full frame behind the car for the rear panel, in my case the rear panel is all fibreglass. Without the full frame I still need something for the fuel tank, so I'll take part of the frame where it supports the tank. Problem is, this makes the car longer than my garage... I'll have a think what to do here.
  • Whilst I remember, the fuel lines will need to be routed. But that will go along with the brake brackets and wiring loom within the transmission tunnel. And I need to buy the fuel line too. And connectors.
  • Handbrake mounting. This is going underneath the steering wheel, which does reduce leg room but it also keeps it off the centre tunnel which is what I want. The equivalent plates are CP12 and 13 (P47) so I'll adapt those to fit.
  • Brake lines. This is another big block of work consisting of;
    • Brake line supports on each corner (P51).
    • Finish welding on the tabs all along the inside of the tunnel.
    • 3D print pipe brackets (or go for P clips).
    • Hard brake pipe fitting.
    • Handbrake cables. I need to check what's needed here, particularly as I'm moving the handbrake. From memory there are two cables from each caliper, that come together in a 'balance bar' arrangement that goes to the handbrake. 
  • Engine mounts. This needs the engine fitting for position, which in turn needs a full day and some dry weather. Fingers crossed for a warm winter here...
  • Pedal box tidying. This is mostly built, but it needs a couple more fixings and needs a bit of loosening up. From memory it only just fits, even the application of paint stops it going on easy. I'll need to get this working better if I have any hope of fitting it with everything else in place.
  • Check the steering rack for fit. I have brackets for the rack, I just need to find out if they go on ok. 
  • Fuel tank straps. No issues here, just a couple of 1mm steel straps that are folded as required. I'll need the mounting bracket done first though.
  • Scuttle panel. This needs the bodywork fitting to see what gap is to be filled.
  • Electrics. Erm... yeah. Lots of. Spaghetti. The wiring loom is still in a carrier bag and needs to be laid out and routed. It's not complicated, but it will be fiddly and time consuming. Oh, and I think I'll need to buy some lights! I have some from the donor, but not a full set.
  • Seat modifications. As mentioned earlier, the seats don't currently fit so I need to modify the seats. 
  • Body fit. Big job here, as with the engine fit it'll be an outside job that could take a day or so. Trial fit the bodywork, make brackets as required, fit the bodywork, rinse and repeat as required.

Oh... that isn't as much stuff as I had expected!!

Interior finished...


Well, that's a huge chunk of work now done. I've spent god knows how many days just on these panels, mainly because this is the primary 'visible' part of the car. Pretty much everything else is going to be covered by the bodywork, this is what I'll see every time I get in the car. 

I didn't really have too many issues with it, I think the main thing I have worries about is the tight fit. I got all the panels down to the closest tolerance I could get, I reckon maybe a tenth of a millimetre in some cases. If there was swarf left on a drill hole, that was enough to misalign the panel!! The problem then comes from the adhesive I'm planning to use alongside the rivets. The adhesive will take up an amount of space, even if it's the tiniest amount it's still going to take up space. I suspect I will need a bit more 'refinement' when it comes to actually putting the panels in place. 

So that's it, that's that job done. Now it's time to take all the panels off and store them somewhere, then figure out what the next job will be. I'd best go get the book and work through my list...

Sunday 1 September 2019

Back after the summer break

Well, now that all the fun and games of summer is done, I can finally get the car back on track. First thing, figure out where I was;


This is all the panels as they are at the moment. It looks like I ended the session with the two outer side panels yet to be cut to shape, and the two inner panels to be trimmed along the top. I'm guessing the trimming on the top was because of the centre panel not being done yet.

And just to see what it might look like, I couldn't resist fitting all the panels temporarily;


I just love this look, it really shows how things are going to come together. Even with the panels not quite adjusted together, I can see the interior and how it'll look. I'm very happy with how it's working, and can't wait to get everything finished here.

It has given me a few things to think about though;

1. The passenger footwell end. No biggie, just a bit of metal to fix in place. Probably welded in steel as that's what the drivers side is. For some reason I keep forgetting it though.

2. There's a slight gap where the back panels meet the floor panels. Again, no biggie, I was going to put sealant around the edge anyway. And it's hidden by the seats.

3. The seat bases don't fit. This is a bit more of a biggie. I knew that they were going to be tight, I didn't appreciate how tight. They basically just don't get anywhere near where they need to go. It looks like I'll have to remove the squab and do some quite severe modification to the base metal. It's quite lucky that I've had to replace the heater elements in my main car, as it's taught me some valuable lessons on how to remove leather and foam!!

So next step is to get the side panels finished off, do the centre panel as removable then trim the other side panels to match. 

Sunday 16 June 2019

Engine and body

Today's tasks were;

Engine trial fit
Bodywork trial fit

Engine first. Well, it was meant to be, turns out someone up there decided rain was more important. I tried a few times, even got the engine in the air and almost into the car. But I didn't think rain was going to do the engine or electrics any good so I abandoned it. At least the garage got a bit of a clean!!

The bodywork was a little more successful, mainly because it's waterproof. I wanted to get it fitted to see how much of a gap there was around the panels. The first thing was that the front had to be trimmed. It was designed to fit a range of chassis shapes, so I expected it to need trimming. A quick centre point marking showed that the current cut out was nowhere near the middle, so a minute or so with the jigsaw took care of that!

Once I was able to drop the body down, it was clear that it needed a bit more trimming to fit. No biggie, it's expected. But again, I got fed up of the rain coming and going, so it went back in the garage.

So for the time being the chassis is on it's side, as the garage is intended for another purpose soon. I have a few 3D printing projects that I want to look at, so the first job is to learn Fusion. 

Friday 14 June 2019

Current progress and pipe fixing

A short update as I have a spare few minutes. The side panels have been cut in line with the back panel, and folded to allow a 20mm section to be rivetted to the back panel. The sheet metal brake that I cobbled together and initially thought was 'a bit rubbish' has actually worked really well. I think the only issue I had with it was the lack of a sturdy base, but it turns out clamping it to the chassis itself provides more than enough stability to fold the aluminium.

I've ended up with panels that are really nicely folded (I'm amazed how well they came out to be honest!), and will butt up against the back panel nicely. The next job will be to cut the notches out of the bottom for the seat cross members, then drill the rivet holes. The inner panels need a small crease added, the outer panels are straight so no more folding needed.

I think the engine fit on the weekend is out of the window though, the wet weather is (literally) putting a dampener on that task.

The next thought on my mind was pipe fixing. Inside the transmission tunnel I've welded some tabs that are intended to carry all the necessary wires, pipes, etc from the front to the back of the car. The tabs are quite substantial, and are done at quite frequent intervals in order to ensure everything is nice and secure. But while that provides the chassis anchor, I hadn't looked into the final fixing. For wiring this just needs to be some sort of protective shield with a cable tie, pipes need something a bit more substantial that is bolted in place.

There is going to be four pipes in total, two brake and two fuel. They will all be copper/kunifer pipes, hopefully I have enough! The runs from front to back are surprisingly short, maybe a couple of metres for each? The bigger issue is the fixing. The normal approach is for a small nylon bracket that the pipes can clip into, but they are hideously expensive (£20 for 10 the last time I checked!). But I now have a 3D printer, so I could actually print some. I'd have to design them from scratch, and I need to consider that 3D printed parts aren't as strong as nylon parts. But they are effectively free (ish) which is always good in the Locost theme!

The other option is P clips. As above, I had thought they were quite expensive, but someone has sent me this link;

https://www.amazon.co.uk/Black-Nylon-Plastic-Clips-Fasteners/dp/B01IHSEO5I/ref=asc_df_B01IHSEO5I/?tag=googshopuk-21&linkCode=df0&hvadid=256110

Which refers to P clips that are much cheaper. Less than £4 for 50 P clips seems to be a good price. Of course these are only for single pipes, but I was thinking for each fixing I could use a combination of four, laid out as;

qp
db

IE four different directions so the holes line up in the middle. I think it'll need some sort of stand off to keep the clips away from the tab, but that's not difficult.

Thursday 13 June 2019

Some thoughts...

Whilst I've been doing the panels, I have come across a few things that I need to remember for later.

Side panels. The GRP bodywork doesn't come all the way down to the side panels, there is a gap of several inches. In the demo car there was a curved piece of aluminium which I was going to replicate. Problem is, I'm out of aluminium. This isn't a huge problem, I couldn't have used the existing aluminium anyway. Trying to put a nice curve into 2mm aluminium would have been very hard work!! Once I have the measurements I'll order a 1mm sheet which should bend easier. It's only a decorative panel so it's not an issue.

Side panels 2. The bodywork attaches to the car at the rollover bar mounting points, and comes in at the corners where the occupants shoulders would be. From memory, this distance was shorter than the actual metalwork width, so once the panel has been fitted I'll need to trim that back. As with the side panels, this might result in a section that needs to be filled by aluminium.

Engine height. Hopefully this weekend I'll be getting everything out of the garage so that I can trial fit the engine. This will be so I can fabricate the mounts, and figure out how much space is available in the engine bay for everything that has to go in there. The main issue is how high to mount it. The general opinion is to have it as high as possible in relation to the bonnet. Even so, this tends to leave the sump hanging below the chassis, which is a good thing. But I don't have a bonnet, or at least I don't have an easily accessible one that I can use to measure. I am hoping that the trial fit of the rear bodywork will give me a height to work to. From there I can work out where to put the engine.

Front part of the rear bodywork. The main tub of the car is made from one piece, with a built in 'firewall' at the front that fits on to the chassis. As above it seems to be designed for a narrower car, (or deliberately moulded small to cater for most chassis variations) so the opening isn't big enough to fit over the bodywork. I'll need to open it up in order for it to fit over the car.

Engine mounting and 'the extra bar'. The plans have a section of a crossmember that is removed in order to allow the engine to fit. I've yet to figure out why, it seems like an ideal position to reduce some lateral flexing, and engine bay pictures suggest there is clearance between the bar and the engine. At the moment it's still there on my car, but if it gets in the way of the engine it will need to be removed.

Engine mounts. I have the original engine mounts from the MX5, and it makes sense to reuse them. The mounts themselves are an angled design that contain a rubber bush, so I think they'll be perfect for fitting. The Saturn plans actually disagree though, they say that a bush in shear isn't a good plan. I'm not sure why, MX5's have had them in that design forever, as have many other cars! I've asked the font of all knowledge, IE locostbuilders, lets see what they say. I did find a picture of an engine mount;


And a gearbox mount;


Sunday 26 May 2019

Back panel change of approach

As you can see in the previous post, I changed my mind about the back panel. The way I'd done the tabs on the edges was only possible if you can manipulate aluminium like paper. As this is impossible in the real world, I've had to redesign what panels go where. Here is the middle back panel as it is now;


I've split off the side parts to make them up as separate panels. This changes a few things;

1. The transfer from back panel to transmission tunnel is now a fold rather than a seam, I think that will look really good.
2. The two side parts can extend on to the panels either side to provide a secure fixing. The transmissions sides and the car sides can then fold in front of them.
3. There will be a seam on the diagonal portion. As this is partly hidden by the back of the seats I'm not overly bothered, I've also positioned the middle panel rivets to allow the side panels to fit in the same place. The panel isn't trimmed to the centre yet but that can be done once I've got the side panels sorted.

Since all four side panels will rely on the back panels being in place, they're the next things to be done. But first... I need to grind down the stitch welds so I have a flat surface, there's no way a panel will sit flat on those lumps!!

Oh, here's the two panels ready to go;


And with the middle panel in place;


Assuming the arrows are referring to the grain of the aluminium, I'm intrigued as to how it will look.

Two down...

The first couple of panels are done, admittedly they're the easy ones that just go on the top.


The process was similar to the floor panels, but I had to be careful with the edges as they're visible. Actually, everything is visible so I had to be careful all over!

I started each panel on an edge and made sure there was enough metal to cover the relevant hole. I drilled a couple of holes for some Cleco's to hold the panel in place, then marked the fold lines. Using my DIY folder (which actually does work on aluminium a lot better than the thinner steel) I put the relevant folds in the panel. Then using Cleco's as I went, drilling and fixing the panel.

The last stage was to trim the panels to size, the power file came in very useful here. I brought each panel flush to the steel, whether I'll regret that decision or not only time will tell.

There is just one panel left for the transmission tunnel top, but that will use rivnuts for fixings. I think I'll start the process the same as the other panels, the rivnuts will use similar if not slightly larger holes.

Next ones are the sides, and I'm not looking forward to those. Folds, cutouts, all manner of unpleasantness. All so I can have a smooth interior, I hope it's worth it!

Sunday 12 May 2019

Panel tetris

So here is the main aluminium panel, with all the pieces attached;


As you can see, it was a bit tight to get all the panels on. There are a few things to note here. First off, I've not left myself much waste between panels, so I'm hoping the cuts will be pretty accurate. I'm also doing something a bit unusual with the back panel. Rather than trying to do it in one large panel (which wouldn't have worked due to the way I've left tags on the panels for fitting), I've split it into three. The two panels near the centre are intended to go behind the passenger and driver, and form the bulk of the panel. The T shape part towards the right is then the middle panel and the first part of the transmission tunnel. I've done it this way so I have quite a clean rear panel between the seats, with adequate room and access for riveting. Bringing it down on the tunnel also allows for a clean transition between the two, without the need for welding a fixing bracket in place.

This will use all of the aluminium I have left, so if I go wrong I've got to buy more. Which won't be cheap, while the panels themselves aren't too bad it's actually getting them home that's the issue. And I've found that most metal suppliers don't work weekends, so it's a case of having to go during work hours.

OT - MIG welder earth lead

Time to go off on a little tangent here. For a while now my welding has been a little 'rough', and as the saying goes 'a poor workman always blames his tools'. However I think in my case it is actually the tool!

My current welder is a Clarke MIG welder, I got it cheap off Gumtree from a place that was upgrading. It was a little rough, but after a clean it seemed to work well, and better than the old Wolf Aldi one that I was working with.

It's always lacked a little 'something' though, so it was time it got a bit of TLC. First off was the liner. It was a steel one originally, but I get the impression it was way past it's use by date. Me being a cheapskate that I am, I bought some net curtain wire for a pound!! It made a huge difference though, even feeding in the wire for the first time I could feel it moving so much easier. It also meant I could turn down the wire tension and the feed speed, which I always felt was higher than it should have needed to be.

The next job was the earth lead. It was definitely something that had never been replaced, and it never felt good with the way it could bend really easily at certain points. I reckon there were several weak points where some of the internals had broken. The clamp itself was also a cheap one, and I frequently found myself with arc points on the clamp where it hadn't quite contacted properly and made it's own weld.

Looking on the internet it seemed the done thing was to replace it with a Dinse connector and upgrade the lead. So that's what I did! In hindsight I should have taken more pictures, but here's the first. It's the offcuts of sleeve, showing the difference between the old wire (right) and the new (left);


Considering it's a 150A welder, and the new wire is rated to 200A, I have no idea what the old wire was even doing there!!

The main challenge with this was that it was crimped directly to the copper winding on the transformer inside the welder. What I did was cut the old cable off about an inch away from the crimp, then open up the copper wires. Once I'd done the same with a length of new wire, I slid them inside each other then soaked the whole thing in solder to give it as good a connection as I could make. Two layers of heat shrink sleeving and the original woven protector over the joint and I was happy with the result.

The next stage was to fix the Dinse connector to the case. This worked surprisingly well, with nice big screw clamps for the wires. I'd bought a pack of five terminals all rated at 200A, and it was just a case of screwing everything down. This is the outside of the case now;


It even fitted in the same location as the old grommet, right down to the keyway that stops it rotating as the cable is clamped on.

The last stage was to make up the cable. So dinse plug on one end, and the new earth clamp on the other. It really was that easy. This is the new earth clamp now;

This is showing one of the terminal connectors that I had, it's quite clear how chunky they are.

And that's it. Of course, at the moment I'm making body panels out of aluminium, so there isn't much welding to be done. Still, I'm looking forward to giving it a go.

Thursday 25 April 2019

Next set of panels

So now to move on to the other aluminium panels. This will be;

1. Seat back panel.
2. Transmission tunnel sides.
3. Car sides.
4. Transmission tunnel top.

As I've mentioned before, the use of a full body allows me to change the design of the interior panels to cover more of the chassis than would normally be done with a seven. This also means I've split the side panels so the front half gives slightly more foot room, and the rear half can be made out of aluminium without using much material.

Anyhow, this is how I'm going to do things;

Transmission tunnel sides. These will go from the back edge of U7 and U8, to the front edge of TT6. Top and bottom will be from the floor to the top edge.

Back panel. This will go from the top of SB2 to the bottom of BR12. The middle section will come down to the bottom of SB3. For the sides, they will extend across both SB1 tubes. And finally a pair of tabs for the transmission tunnel will make a rivet surface against U7 and U8, on top of the side panels.

Car side panels. Top and bottom to match the car. Front edge up to U4 and U5. Rear edge will need a tab to cover one half of SB1. Not sure yet whether it'll be an inside or outside tab, outside will be harder to do but inside would be visible,

Transmission top. This is done in three parts. SB3 to TT8 will be riveted. TT8 to TT5 will need to be rivnuts as the panel will need to be removable. Although as I'm typing, I've realise I need to test the engine mount first to know where the gear shift will end up!! The last panel is TT5 to TR8 or TR9, again dependent on where the gear shift is.

That's it for now I think, the car is on it's side and I'll be making up some paper templates to figure out the best way to cut those panels. More photo's as the panels get chopped up.

Floor... finished

One box of these later;


And a whole load of hole drilling got me here;


Then a load of cutting and finishing to get the edges matched to the chassis (picture missing because, well, I moved on to the next bit without taking a photo!).

So the floor is done, time for the next panels...